Mixpanel (Legacy) Destination
Destination Info
- Accepts Page, Alias, Group, Identify, and Track calls
- In Cloud-mode, refer to it as Mixpanel, or Mixpanel (Legacy) in the Integrations object
- In Device-mode, refer to it as Mixpanel in the Integrations object
Components
Mixpanel is an event tracking and segmentation platform for your web and mobile apps. By analyzing the actions your users perform, you can gain a better understanding to drive retention, engagement, and conversion. The client-side Mixpanel Destination code is open-source.
Segment’s Mixpanel destination code is open source and available on GitHub. You can view these repositories:
Getting Started
- From the Segment app Destinations page click on Add Destination.
- Search for Mixpanel in the Destinations Catalog and confirm the Source to connect to.
- Copy your Mixpanel “API Secret” and “Token”, and paste them into the Connection Settings in Segment.
- Enable the destination to start sending your data to Mixpanel.
Page
If you’re not familiar with the Segment Specs, take a look to understand what the Page method does. An example call would look like:
analytics.page()
By default, the Page call is transformed to Mixpanel events. This sends all page and screen calls with a single name, for example Loaded a Page or Loaded a Screen respectively, with the calls’ properties in the body. This gives the best experience of Page/Screen analytics with Mixpanel’s reporting.
You can disable this default by changing the “Track All Pages to Mixpanel with a Consolidated Event Name” in the Mixpanel destination settings.
If you want to track the page or screen calls to Mixpanel with the name or category in the event name, Segment offers these options to send page/screen calls:
- Track All Pages to Mixpanel with a Consolidated Event Name
- Track all Pages to Mixpanel
- Track Categorized Pages to Mixpanel
- Track Named Pages to Mixpanel
Beginning with “Consolidate Page” calls, the following options are each mutually exclusive. See the code for details.
Prioritization of settings
When you use the Mixpanel destination in Cloud-mode, Segment sends events for each option you select. This may result in Mixpanel receiving duplicate events for a single page call.
When you use the Mixpanel destination in Device-mode, Segment prioritizes the options to prevent duplicate calls as follows:
-
If you select “Track all Pages to Mixpanel”, all
pagecalls regardless of how you have customized it will send aLoaded A Page. Even if you have the other options enabled, Segment sends this call to prevent double counting your pageviews. -
If you select “Track Categorized Pages to Mixpanel”, Segment sends a
Viewed [category] Pageevent. -
If you select “Track Named Pages to Mixpanel”, Segment sends a
Viewed [name] Pageevent.
If both Option 2 and 3 are enabled, Segment gives precedence to category. If you pass both category and name, (for example, analytics.page('category', 'name');), Segment sends a Viewed category name Page to Mixpanel.
In short, Segment sends one event to Mixpanel per page call.
Identify
If you’re not familiar with the Segment Specs, take a look to understand what the Identify method does. An example call would look like:
analytics.identify('userId123', {
  firstName: 'James',
  lastName: 'Gibbon'
})
The first thing you’ll want to do is to identify your users so Mixpanel knows who they are. You’ll use the Identify method to accomplish this which takes the unique userId of a user and any traits you know about them.
Important: Mixpanel used to require that you call alias in all libraries to connect anonymous visitors to identified users. However, with the release of Mixpanel’s new Identity Merge feature this is no longer necessary. To enable ID Merge, go to your Mixpanel Settings Dashboard, navigate to Project Settings > Identity Merge and enable the setting from that screen. If you are not using this setting, use the instructions below.
As soon as you have a userId for a visitor that was previously anonymous you’ll need to alias their old anonymous id to the new userId. In Mixpanel only one anonymous user history can be merged to one identified user. For that reason you should only call alias once, right after a user registered, but before the first identify.
People
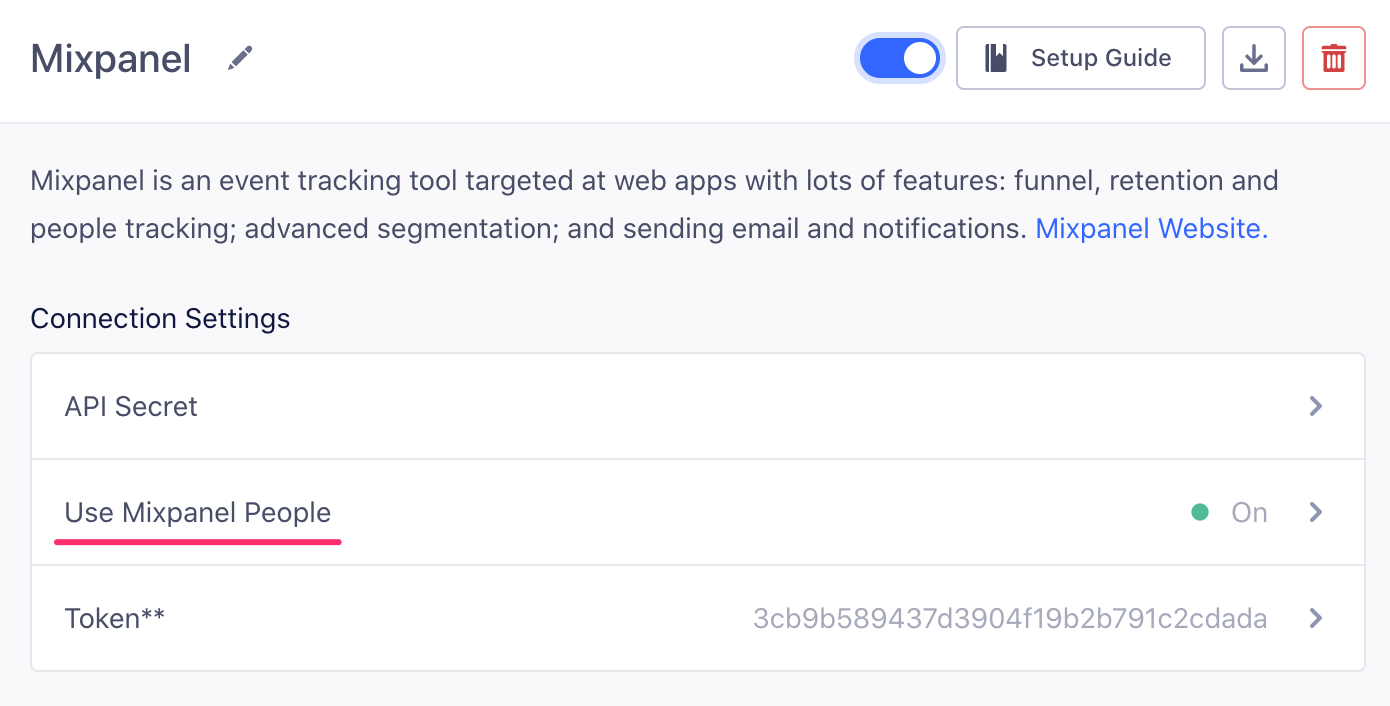
Segment doesn’t send data to Mixpanel People by default. To enable Mixpanel People, change the “Use Mixpanel People” setting in the Mixpanel Destination settings in Segment.
To add people properties in Mixpanel before you know the user’s unique database userId, you can identify traits without the userId.
This only works in Analytics.js and the Segment mobile SDKs.
The identify call would look like this in Analytics.js if you only want to set people properties without a userId:
analytics.identify({
  email: 'hello@example.com',
  name: 'Ian Taylor'
})
Group
Group calls are sent to Mixpanel if, and only if,
- The Group Identifier Traits setting has one or more traits saved in the destination settings for Mixpanel.
- You have created a group key of the same name in your Mixpanel project settings.
- A Group trait with the same name as one of the configured Group Identifier Traits is sent with the group call.
analytics.group("0e8c78ea9d97a7b8185e8632", {
  name: "Initech",
  company_id: "0e8c78ea9d97a7b8185e8632", // Group identifier trait.
  industry: "Technology",
  employees: 329,
  plan: "enterprise",
  "total billed": 830
});
Mixpanel supports multiple definitions of groups. For more information see Mixpanel’s Group Analytics documentation.
If the group call does not have a group trait that matches the Group Identifier Traits setting, then the event will be ignored.
If you’d like to connect a track call to a group call in Mixpanel, send the group’s ID as a property on the track call named $group_id.
Group using Device-mode
When you use Analytics.js, you must set a userId value, or Mixpanel will ignore Group calls.
When using Analytics.js, a userId must be set or group calls to Mixpanel will be ignored. When you call the Identify method from the client in either a browser using Analytics.js or one a mobile SDKs, several things occur:
Segment recognizes and translates the special traits so that they fit the expectations of Mixpanel’s API. The table below shows the mappings. Pass the key on the left and Segment transforms it to the key on the right before sending to Mixpanel.
created |
$created |
email |
$email |
firstName |
$first_name |
lastName |
$last_name |
name |
$name |
username |
$username |
phone |
$phone |
Group using Cloud-mode
When you call the Identify method from any of Segment’s server libraries, Segment creates or updates the user in Mixpanel People with the traits you provide. Calling identify doesn’t create any users in the standard Mixpanel reporting interface since that only supports track events.
You won’t see server-side traits appear as super-properties on any events you track. This is because Mixpanel has no REST API for setting super properties for a distinct_id, so identify calls only affect Mixpanel People.
For Mixpanel People, it’s important to identify a user before you call track. A track without an identify won’t create a user in Mixpanel People.
If you use Cloud-mode, you must explicitly include the grouping value as an event property for any event you want to analyze using Mixpanel’s Group Analytics.
Register Super Properties
By default, each trait (that is, properties in an identify call) is registered as a super property. This doesn’t require passing a userId in the identify call. You can pass a traits object by itself and it will still register the traits as super properties.
Disable Set All Traits as Super Properties or People Properties By Default to disable the default behavior and register super properties explicitly. For more information, see Explicitly set People Properties and Super Properties.
Super properties require a device mode connection.
Set People Properties
If you’ve enabled Mixpanel People in your Segment settings, Segment calls Mixpanel’s people.set with the same traits object. There’s no need for an additional API call to populate Mixpanel People.
Disable Set All Traits as Super Properties or People Properties By Default to disable the default behavior and register super properties explicitly. Segment automatically includes any trait on an identify that matches one of Mixpanel’s special properties, which you can see in the table above. For more information, see Explicitly set People Properties and Super Properties.
If you call identify without a userId, it may not set the People Properties inside Mixpanel, but it will cache those traits for later use with Segment’s analytics.js. It is best practice to always call identify with a userId.
Arrays
For array type traits passed to identify calls, Segment uses Mixpanel’s people.union to union (append ignoring duplicates) them to their existing values. If the trait doesn’t exist a new array will be created for you. To clear the contents of an array trait, you can pass an empty array [].
Track
If you’re not familiar with the Segment Specs, take a look to understand what the Track method does. An example call would look like:
analytics.track('Button Clicked')
Because Mixpanel is an event tracking analytics tool, you’ll want to track your user’s actions. The more useful events you track, the better Mixpanel becomes.
You should use the track method to accomplish this. The Segment track method maps events and event properties directly to Mixpanel events and event properties.
Track Charge
If Mixpanel People is enabled in your Segment settings and you include an event property called revenue, Segment tracks a charge to the current user.
Reserved Properties
There are two strings to avoid when naming event properties that will be sent to Mixpanel: length and bucket. length is interpreted as the JavaScript .length method, which causes the mixpanel.track call to fail silently. bucket is a reserved property that was used in the early days of Mixpanel. If you include a property called bucket in your events, it will not show up in the UI. However, it will not cause the mixpanel.track call to fail.
Alias
If you’re not familiar with the Segment Specs, take a look to understand what the Alias method does. An example call would look like:
analytics.alias('newUserId')
Important: Mixpanel used to require that you call alias in all libraries to connect anonymous visitors to identified users. However, with the release of Mixpanel’s new Identity Merge feature this is no longer necessary. To enable ID Merge, go to your Mixpanel Settings Dashboard, navigate to Project Settings > Identity Merge and enable the setting from that screen. If you are not using this setting, use the instructions below.
As soon as you have a userId for a visitor that was previously anonymous you’ll need to alias their old anonymous id to the new userId. In Mixpanel only one anonymous user history can be merged to one identified user. For that reason you should only call alias once, right after a user registered, but before the first identify. To merge identities in Mixpanel, send an identify call with both the previous anonymous ID, and the new user ID, as follows:
analytics.alias('anonId','newUserId');
You can track the action that caused the user to be identified or created. For more information, see Best Practices for Identifying Users.
Read more about how Mixpanel recommends using alias in their docs.
Segment recommends that you alias on the client whenever possible, due to technical limitations with aliasing server-side.
Alias using Device-mode
In client-side JavaScript you only need to pass the new identified userId. Segment aliases the old anonymous id to your new userId.
Here’s a JavaScript example where the new userId is 12345:
analytics.alias('12345');
analytics.identify('12345');
analytics.track('User Signed Up');
Alias using Cloud-mode
If an identify or track call arrives to Mixpanel with a new distinct_id too quickly after an alias call, there is a race condition between the event and the alias call. As long as your identify and track calls arrive ~1 second after the alias, this shouldn’t be an issue; when the alias queue is backed up, Mixpanel queues events as well, mitigating the race condition.
However, in cases when events are processed too quickly, before their corresponding alias, your calls can result in split/duplicate profiles.
Mixpanel’s client-side JavaScript library fixes this issue by continuing to send track calls to the original mixpanel distinct_id while the records update.
Segment recommends that you alias for Mixpanel on the client side through Analytics.js to avoid creating split profiles and broken funnels.
However, in certain circumstances, despite the risk of duplicate profiles, you may still wish to send the calls server-side. In those cases, there are two options for calling alias from your servers:
In Conjunction with Client-Side Tracking
If you track anonymous users on the client side either from a browser or one of a mobile SDK, pass the Mixpanel distinct_id from the browser to your servers in order to alias it to the new userId.
First, use analytics.ready to grab the Mixpanel distinct_id:
analytics.ready(function(){
    var anonId = mixpanel.get_distinct_id();
});
Next, pass the anonId to your server and alias, identify, and track your new user.
Here’s a Node example where the new userId is 12345:
analytics.alias({ previousId: anonId, userId: '12345' });
analytics.flush(); // flush the alias

analytics.identify({userId: '12345'});
analytics.track({
  userId: '12345',
  event: 'Connected Facebook'
});
Segment recommends that you flush the alias to give Mixpanel more time to process it on their side before you identify and track.
Tracking Exclusively Server Side
If you’re tracking anonymous users with a server-side library, you can alias the anonymous id to the new userId.
Here’s a Python example of the alias, identify, track sequence where the anonymous id was 92fh49fqh9849hf and the new userId is 12345:
analytics.alias('92fh49fqh9849hf', '12345')
analytics.flush() # flush the alias

analytics.identify('12345')
analytics.track('12345', 'Registered')
Segment recommends that you flush the alias to give Mixpanel more time to process it on their side before you identify and track.
Best Practices
Collecting contextual properties
If you send events server side, depending on your library (JS, mobile, or server), Segment maps as many Mixpanel supported contextual properties as possible.
You can see which context properties are being automatically collected by any Segment library. If you use a library that doesn’t support a certain contextual property, you can still send them manually with your events, as long as it’s sent in accordance with the spec.
For example, if you want to send utm parameters with your server side library, you can attach a context.campaign object like this:
// node library

analytics.track({
  userId: '019mr8mf4r',
  event: 'Purchased an Item',
  properties: {
    revenue: 39.95,
    shippingMethod: '2-day'
  },
  context: {
    campaign: {
      name: "TPS Innovation Newsletter",
      source: "Newsletter",
      medium: "email",
      term: "tps reports",
      content: "image link"
    }
  }
});
Segment doesn’t map $library_version since that is reserved for Mixpanel’s library version, not Segment’s. Segment doesn’t map to $brand.
Features
People
Segment doesn’t send data to Mixpanel People by default. To enable Mixpanel People, change the “Use Mixpanel People” setting in the Mixpanel Destination settings in Segment.
If you want to add people properties in Mixpanel before you know the user’s unique database userId you can identify traits without the userId.
Your identify call would look like this in Analytics.js if you only want to set people properties without a userId:
analytics.identify({
  email: 'example@example.com',
  name: 'Ian Taylor'
})
UTM Campaign Parameters
When used in Device Mode through a web source, Segment’s client-side Javascript library, Analytics.js, loads mixpanel.js (Mixpanel’s direct SDK) in the background. As a result, you’ll get the exact same functionality from Mixpanel around UTM Campaign Parameters as you would when using Mixpanel directly.
Read more in Mixpanel’s UTM docs
In order to pass UTM parameters server-side, you can either pass properties or traits of utm_source, utm_medium, utm_campaign, utm_content, and utm_term in your track and identify calls, or pass them in your context object, for example:
// node library

analytics.track({
  userId: '019mr8mf4r',
  event: 'Item Purchased',
  properties: {
    revenue: 39.95,
    shippingMethod: '2-day'
  },
  context: {
    campaign: {
      name: "TPS Innovation Newsletter",
      source: "Newsletter",
      medium: "email",
      term: "tps reports",
      content: "image link"
    }
  }
});
Explicitly Set People Properties and Super Properties
Previously, Segment set all traits and properties as both Super Properties and People Properties (If you had Mixpanel People enabled). Now Mixpanel allows you to segment your reports by both People Properties and Super Properties. To give you better precision and control over what property or trait gets set as a Super Property or People Property, you can disable Set All Traits as Super Properties or People Properties By Default and pass in the properties or traits that you want to send to Mixpanel as People or Super Properties as shown below. Segment passes through all of Mixpanel’s special traits as People Properties so you only need to add the ones that aren’t on this list.
Incrementing events
You don’t need to add extra code to increment event counts for Mixpanel people, as long as they are “known users”. Supply the events that should be incremented.
You can find this in the Advanced Options of your Mixpanel settings on your Segment Destinations page.
For each event name listed, Segment calls Mixpanel increment, and set a user trait of Last + .
For example, if you add Logged In to the list of increment events, Segment increments a user trait called Logged In and set a trait called Last Logged In with the current date and time.
If you’d like to add an increment for viewing a specific page or screen, ensure you have the setting “Track Named Pages” selected and use the dynamically generated event name under “Events to Increment in People.” For example, .page('Signup') would translate to “Viewed Signup Page” and .screen('Listing') would translate to “Viewed Listing Screen”.
Remember, Segment sends one event per page call.
Increment works for “known users”, so if your track call is being made server-side, you need to pass a userId. If your track call is being made client-side, you need to identify the user first.
Incrementing properties
To increment at the property level, tell Segment which properties you want to increment using the Properties to increment setting and Segment calls Mixpanel’s increment for you when you attach a number to the property. For example, you need to increment the following property:
analytics.track('Event Name', {
feedback_day_number: 1
}
);
Enter the propertyname: _feedback_day_number_ in the destination settings. The property value now increases from 1.
Reset Mixpanel Cookies
When a user logs out, Segment recommends that you call analytics.reset(); to clear the Segment cookie. This function isn’t mapped to Mixpanel’s reset method. If you have issues with distinct_id for example, if it’s not matched with the right user, you should add this to your logout flow:
analytics.ready(function(){
  window.mixpanel.cookie.clear();
});
Ignore IP from Server to Disable Geo-location in Mixpanel People
To avoid having any IP address sent to Mixpanel and by doing so, turn off geo-location for server-side users, pass the context.ip as 0.
Here’s a python example:
analytics.track(user_id=user.id,
  event='Ignore My IP', context={
  'ip': 0
})
Provide context.ip to all your identify, track, and alias calls to make sure Mixpanel doesn’t geo-locate your users.
Sending data to Mixpanel’s European Union Endpoint
To implement Mixpanel in the European Union, enable the setting “Enable European Union Endpoint” on the Settings tab of the Mixpanel destination. When this setting is enabled, Segment updates the endpoint for any data sent from server-side libraries, browsers using Analytics.js, or the iOS SDK.
If you send data with the Android SDK, specify the different endpoints with meta-data tags. On your app’s AndroidManifest.xml file, add the following tags under your <application> tags to override the track, engage, and group endpoints:
<meta-data android:name="com.mixpanel.android.MPConfig.EventsEndpoint"
           android:value="https://api-eu.mixpanel.com/track?ip=" />
<meta-data android:name="com.mixpanel.android.MPConfig.PeopleEndpoint"
           android:value="https://api-eu.mixpanel.com/engage=" />
<meta-data android:name="com.mixpanel.android.MPConfig.GroupsEndpoint"
           android:value="https://api-eu.mixpanel.com/groups" />
See the Mixpanel documentation on their European Union endpoint for additional information.
Troubleshooting
When Will I See Data from my Mobile App?
If you already have an app deployed with the Segment library, and you just enabled Mixpanel mobile, it can take up to an hour for all your mobile users to refresh their Segment settings cache, and learn about the new service that you want to send to.
After the settings cache refreshes, the library starts to send data to Mixpanel.
Also worth noting, Mixpanel’s SDK only submits requests to the Mixpanel servers when the app is backgrounded. That means you may see events in your Segment debugger while testing, but those requests won’t actually be forwarded to Mixpanel until the app gets sent to the background.
If you’re testing in Xcode remember you must first background the app, then the events will show up in Mixpanel. If you terminate the session without backgrounding those events will be lost.
I’m seeing events come into Mixpanel but not people.
- You’ll need to make sure you’re using
identify. A Mixpanel track doesn’t create users in Mixpanel People. - Make sure to turn on the “People” setting so that all of your
identifycalls will be sent to Mixpanel’s People feature. - Make sure you disable the default filter in the Mixpanel People Explore tab.
Appendices
Distinct ID
In Device-mode, when a distinct_id is present in the browser, it is automatically sent to Mixpanel. In Cloud-mode, the distinct_id is set to Segment’s userId if one is present. If there is no userId on the payload, anonymousId is set instead.
Insert ID
$insert_id is only available for cloud events. For the Mixpanel (Legacy) destination, Segment generates $insert_id from the messageId, event name, and Mixpanel namespace constant using the uuidv5 function:
const insertId = uuidv5(`${messageId}:${projectId}:${eventName}`, MIXPANEL_NAMESPACE)
IP
If an ip property is passed to Mixpanel, the value will be interpreted as the IP address of the request and therefore automatically parsed into Mixpanel geolocation properties (City, Country, Region). After that IP address has been parsed, they will throw out the IP address and only hold onto those resulting geolocation properties. As such, if you want to display an IP address as a property within the Mixpanel UI or within raw data, you will simply want to slightly modify the naming convention for that property.
Instead of ip, you can use a property name of user IP or IP Address (whatever is most clear for your implementation). This way, Mixpanel won’t automatically interpret the IP address as an IP address, and instead store that value as a property on the event. You can read more here.
Bypass “Last Seen” in Server-side Calls
You can bypass the automatic re-setting of the “Last Seen” date property by passing active with a value of false in the context object, as follows:
analytics.identify(
  user_id='12345',
  traits={
    'name': 'Frank'
  },
  context={
    'active': false
  }
)
Push Notifications
Push notifications are only available for projects bundling the Segment-Mixpanel SDK.
In-App Notifications
In-app notifications are only available for projects either bundling the Segment-Mixpanel SDK or using the client-side Web integration. Configure in-app notification handlers by calling into native Mixpanel methods.
A/B Testing
Device Connection Mode (Bundled Mobile SDK)
Segment supports Mixpanel push notifications automatically using the didRegisterForRemoteNotificationsWithDeviceToken method.
For in-app notifications and surveys, follow the Mixpanel documentation here. Use the native functionality to control when to show an in-app message by following the instructions here and calling the native Mixpanel methods.
Cloud Connection Mode (Unbundled/ Server-side)
If you use Mixpanel server side and you have access to your users’ device tokens, you can import into Mixpanel by sending the token using context.device.token as described in the specs with an identify call. Segment sends the token as Mixpanel’s special trait $ios_devices. This only works on iOS. In order to use push on Android, you must bundle the Mixpanel SDK.
For example, using the node library:
analytics.identify({
  userId: '019mr8mf4r',
  traits: {
    name: 'Michael Bolton',
    email: 'mbolton@example.com',
    plan: 'Enterprise',
    friends: 42
  },
  context: {
    device: {
      token: 'ff15bc0c20c4aa6cd50854ff165fd265c838e5405bfeb9571066395b8c9da449'
    }
  }
});
Tracking Mixpanel Push Notification Open Rate
To enable push tracking, click the checkbox within Mixpanel as explained in Mixpanel’s documentation. This feature allows push notification opens to be tracked as properties of an app open event, however this will miss pushes which are received when the app is already open.
To add push open tracking, Mixpanel requires that on initialization Mixpanel is launched with options. Segment makes this available through the factory (instancetype)createWithLaunchOptions:(NSString *)token launchOptions:(NSDictionary *)launchOptions;
Note: Push open tracking in Android is not currently supported by the Mixpanel Android library.
Using Mixpanel with Engage
Mixpanel is a product analytics platform that is compatible as a Engage destination.
You can send computed traits and audiences created in Engage to Mixpanel and use them to create dashboards, run cohort analyses, or to power messages.
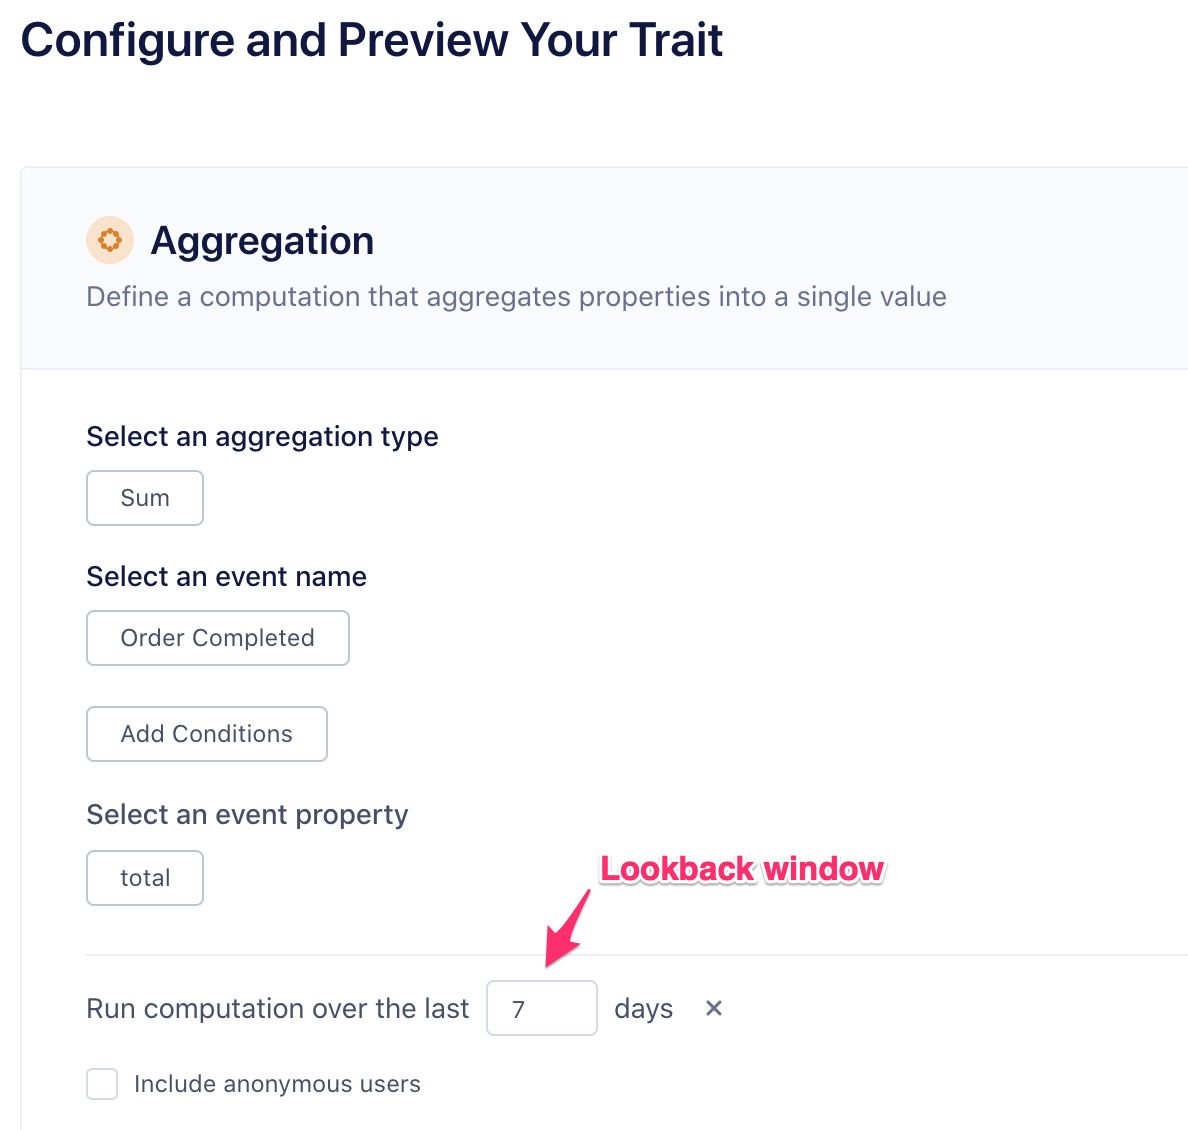
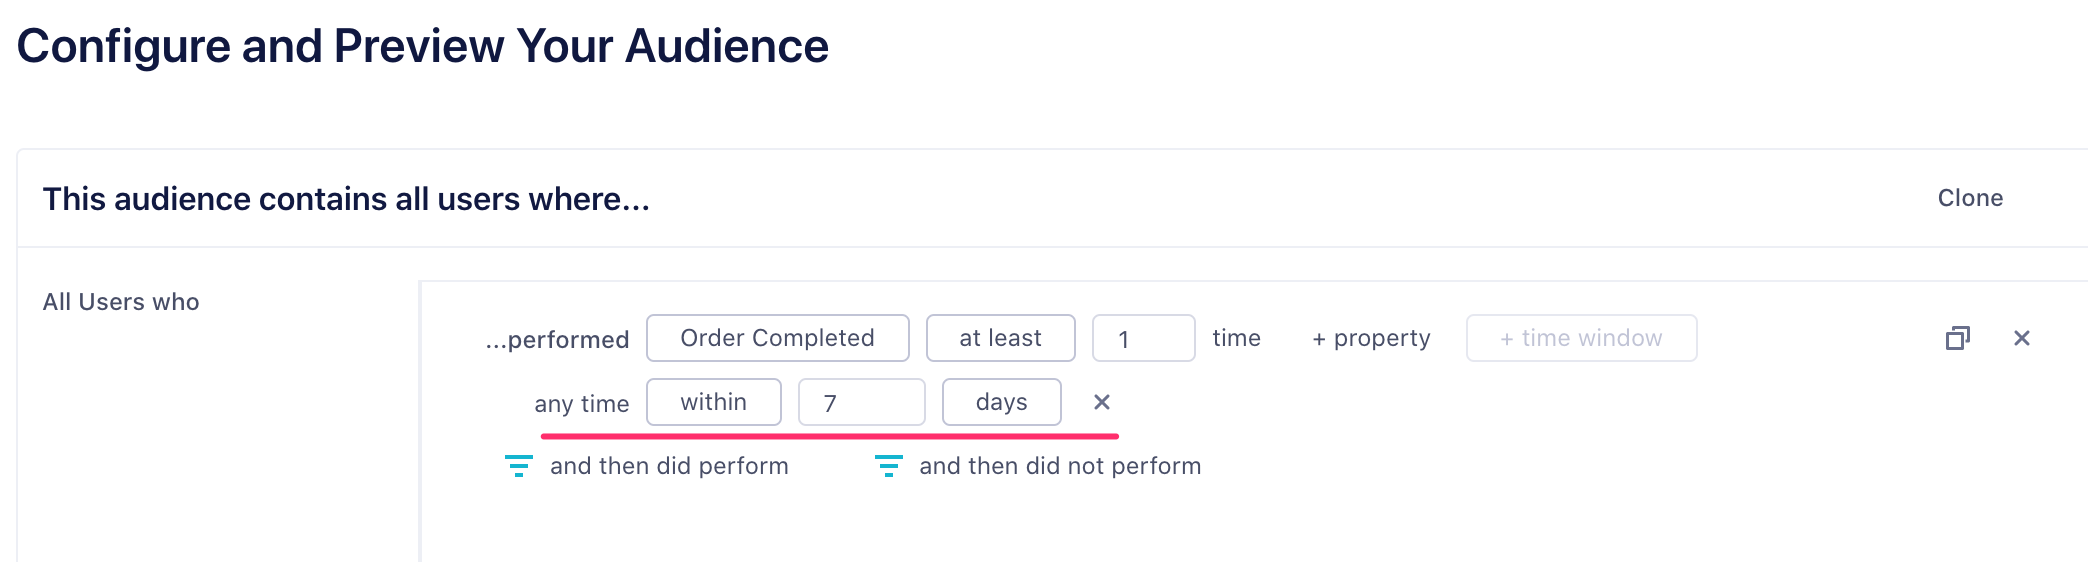
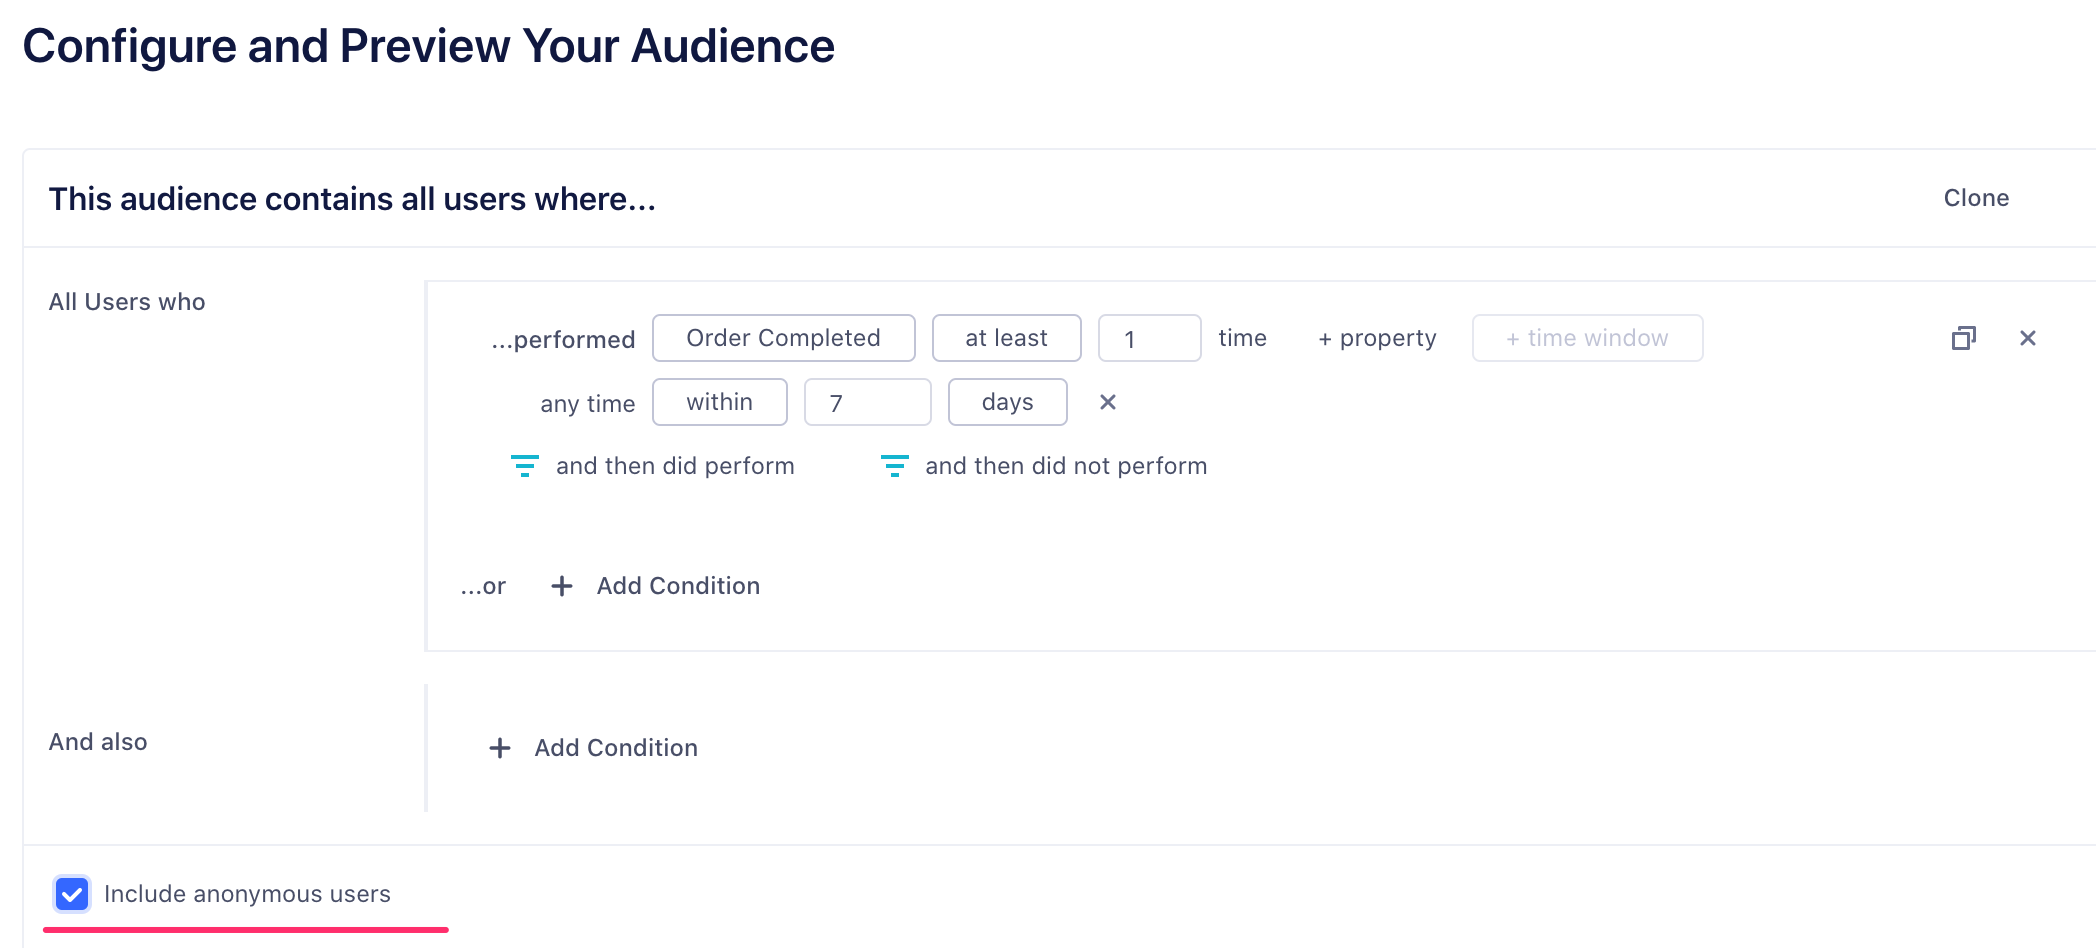
You can set a “lookback window” for both computed traits and audiences, which limits the period of time in which data is considered when calculating the trait or audience. For example, you might set a lookback window of 7 days on an audience or trait like new_users_7_days, but you would not add a lookback window to a trait that isn’t time-bounded, for example lifetime_value .
When you specify a lookback window, Engage updates the audience or trait hourly. If you do not specify a lookback window, Engage continuously updates both computed traits and audiences in real time.
Using Engage Computed Traits with Mixpanel
You can send Computed Traits created in Engage to Mixpanel as identify calls to create user properties in Mixpanel.
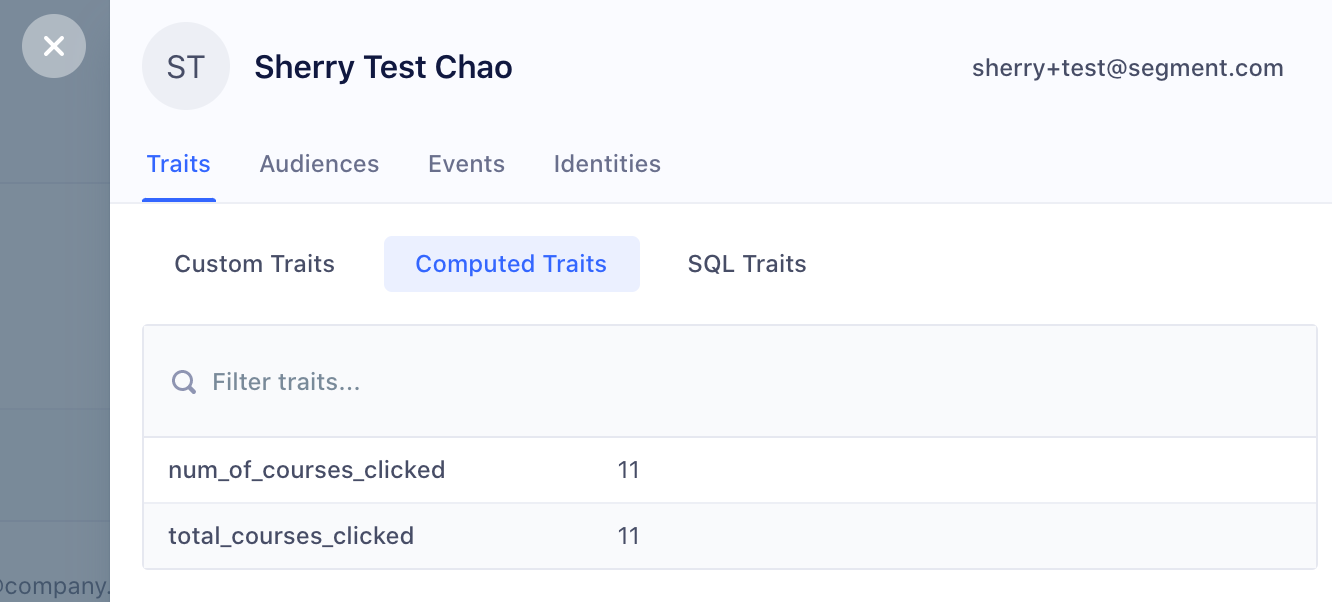
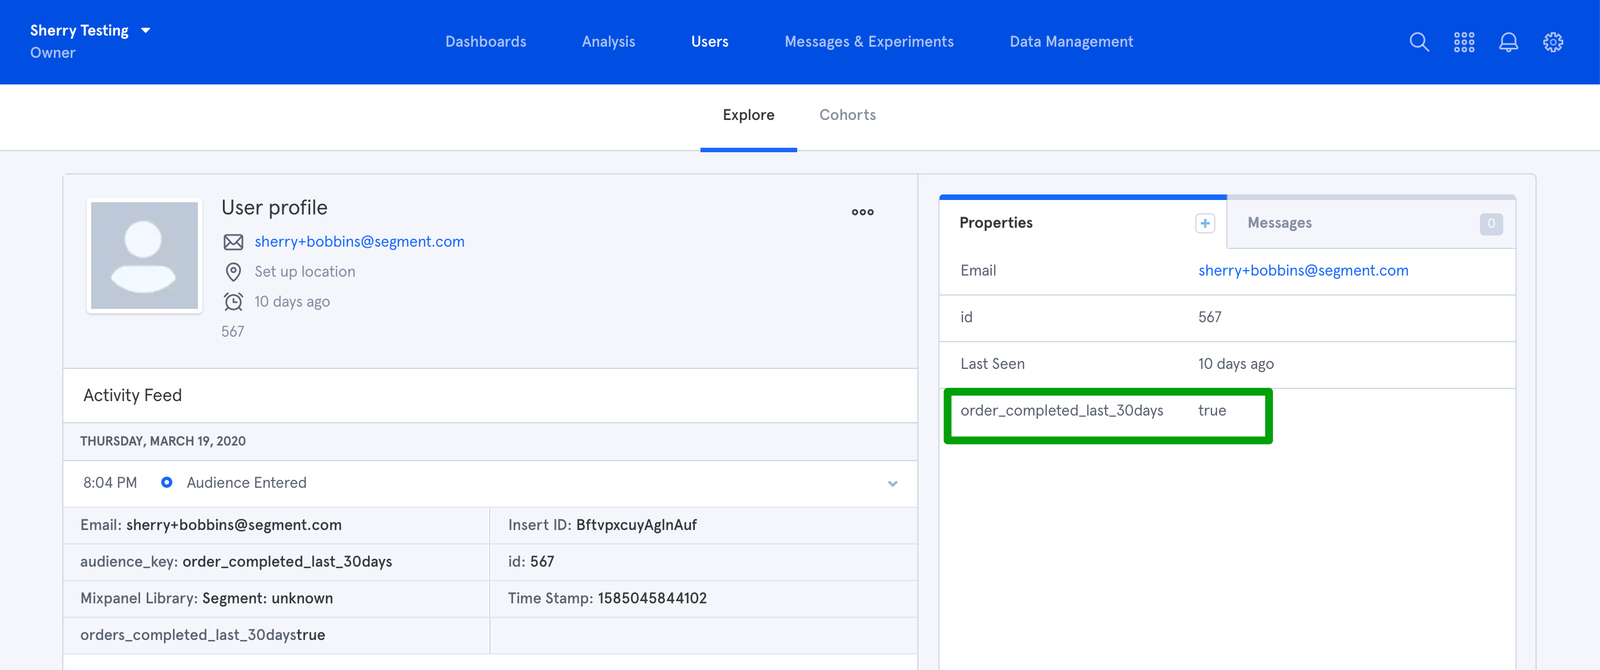
You can check a specific user profile in Mixpanel for Computed Traits by going to Users → Explore and search for a specific user to view their profile.

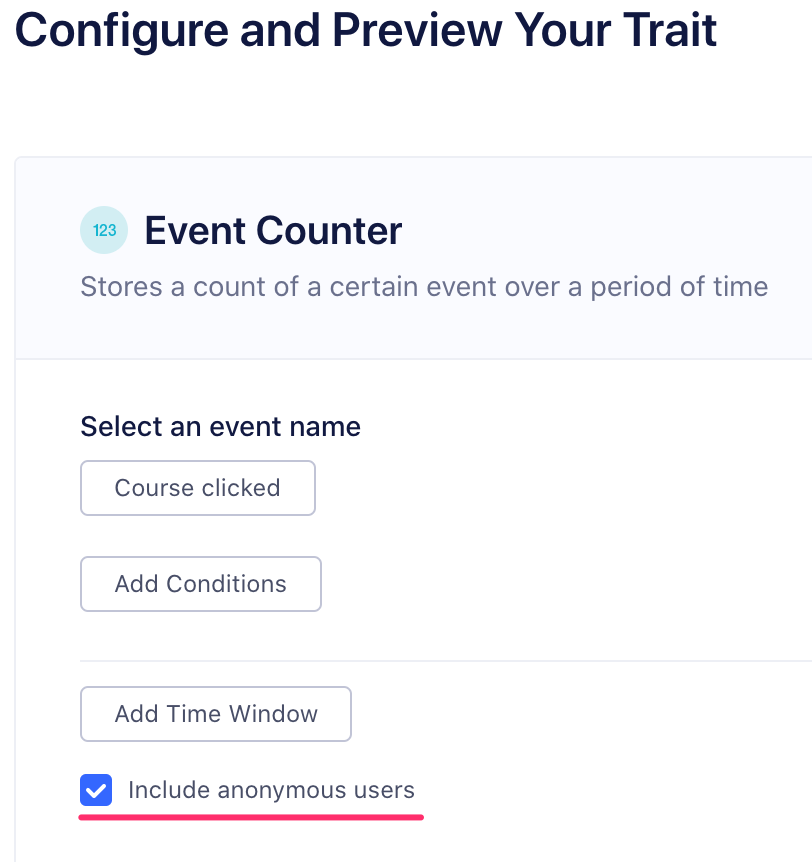
Computed traits without a lookback window search across all historical events, and update in real time.
Computed traits with a lookback window only search across events that occurred within the specified time frame. Computed traits with a lookback window are updated hourly.
If you choose to include anonymous users when you create the computed trait, you must use the alias call to merge user profiles when they become a known user.
Using Engage Audiences with Mixpanel
You can send Engage Audiences to Mixpanel as identify or track calls. You can choose the type of call to send when you add Mixpanel as a destination for an audience.
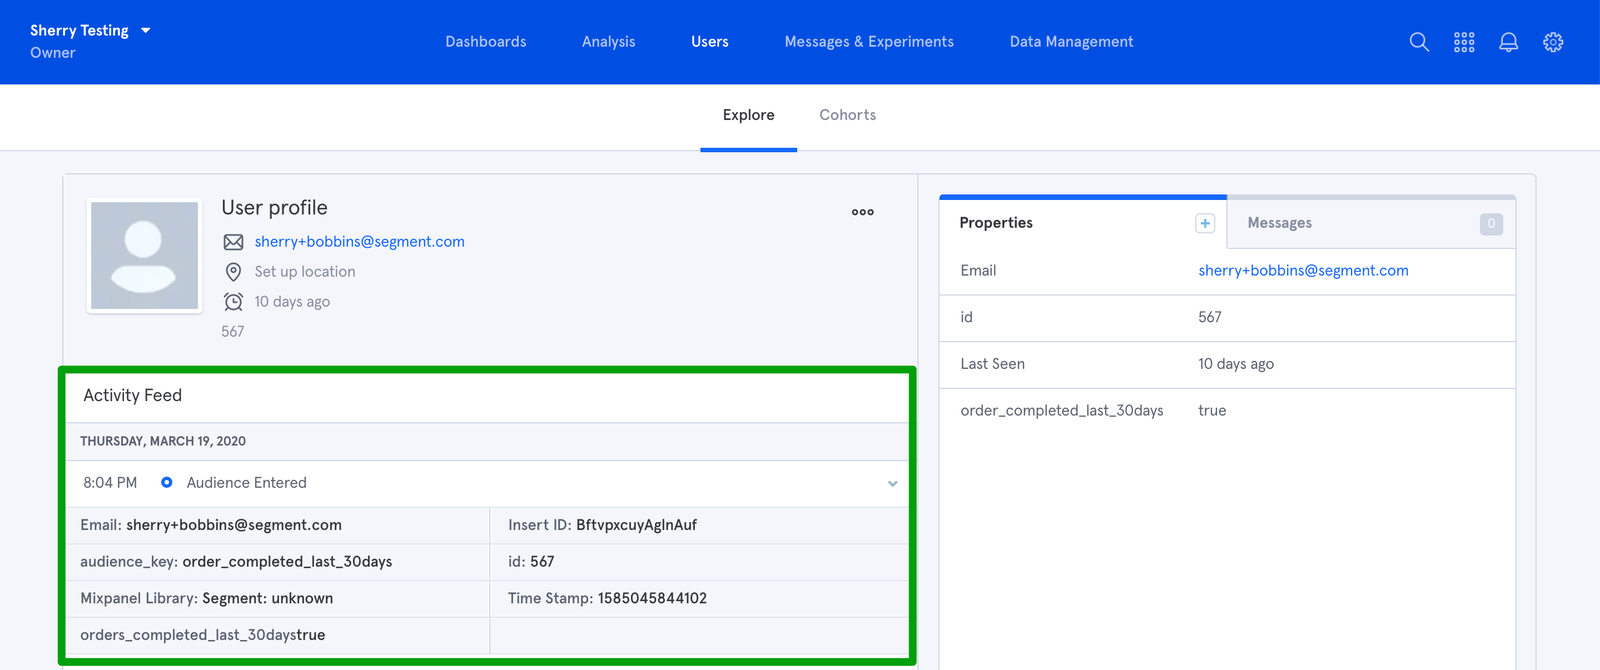
When you send custom traits as identify calls, the name of the audience is added to the user’s profile as a user trait, with a boolean value to indicate if the user is in the audience. For example, when a user first completes an order in the last 30 days, Segment sends an identify call with the property order_completed_last_30days: true. When this user no longer satisfies these criteria (for example when their last purchase was more than 30 days ago) Engage sets that value to false.

You can check a specific user profile in Mixpanel for Computed Traits by going to Users → Explore and searching for a specific user to view their profile.
When you first create an audience, Engage sends an identify call for every user in the audience. Later syncs only send updates for users who were added or removed from the audience since the last sync.
When you use track calls, Segment sends an Audience Entered event when the user enters the audience, with the audience name as a property of the event. When the user exits the audience, Engage sends an Audience Exited event with the same property.
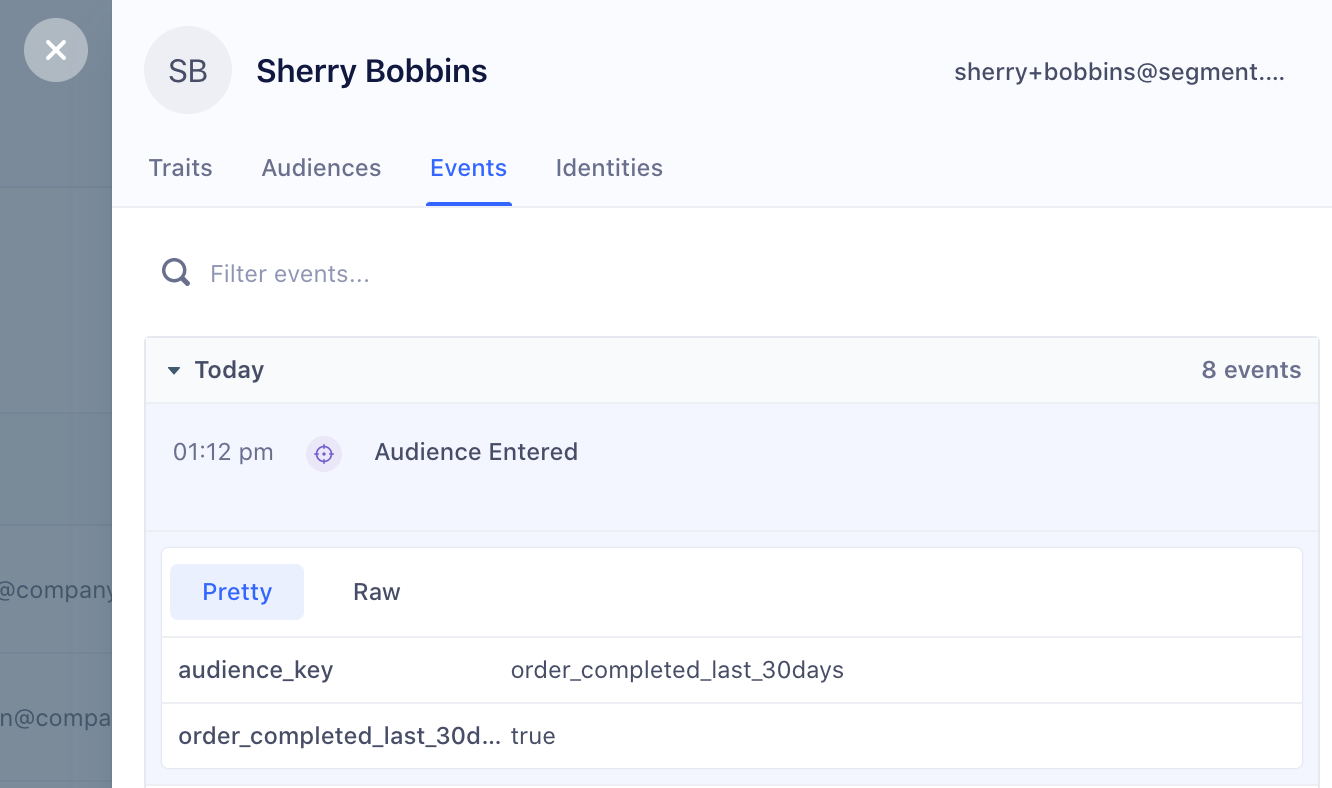
You can check a specific user profile in Mixpanel for audience events by going to Users → Explore and searching for a specific user to view their profile. Look for Audience Entered and Audience Exited events in the Activity Feed.
Audiences without a lookback window searches across all historical events and update in real time.
Audiences with a lookback window only search across events that occurred within the specified time frame. Audiences with a lookback window are updated hourly.
If you choose to include anonymous users when you create an audience, you must use the alias call to merge user profiles when they become a known user.
Setting Up Engage and Mixpanel
To send computed traits or audiences to Mixpanel, connect the destination to your Space. Once it’s set up, you can select Mixpanel as a destination for Engage data when you create computed traits or audiences.
- In your Segment workspace, click Engage in the left navigation bar, and select your Space.
- Click Engage Settings and select the Destinations tab.
- Click Add Destination.
- Search for Mixpanel and click add destination.
- Enter your API Secret and Token for the integration.
- Enable the “Use Mixpanel People” toggle. This allows Engage to send
identifycalls to Mixpanel.
Tip: Mixpanel now accepts Identify calls by default. Previously, this was an additional paid feature.
Mixpanel Engage Details
- Supports Engage: Yes
- Engage Destination type: Event Method (data is delivered to this Destination one-by-one on a realtime basis)
- Traits and Audiences created by: Traits and audiences are added as user properties using
identifycalls. You can send Audiences asAudience EnteredorAudience Exited trackcalls with the audience name as an event property. - Must create audience_name field before Engage can update those values?: No. If sent as an
identifycall, Engage auto-creates the computed trait or audience name as a user property. - Audience appears as:
- Computed traits appear as a lower case user property with spaces converted to underscores.
- For audiences sent as an
identifycall, Engage creates a lower case boolean (true/false) user property. Spaces are converted to underscores. - For audiences sent as a
trackcall, Engage sendsAudience EnteredandAudience Exitedevents with the audience name as an event property.
- Destination rate limit: None
- Lookback window allowed: Yes, unlimited.
- Identifiers required :
userIdoranonymousId - Identifiers accepted :
userIdoranonymousId - Client or Server-Side Connection: Server-side
Mixpanel Engage FAQs
What happens if I delete an audience or trait in Segment?
If you delete an audience or trait in Segment, it isn’t deleted from Mixpanel. To remove an audience-created property in Mixpanel, you must use either the Mixpanel Engage API using the $unset method or hide user properties from the Lexicon.
If a user has multiple external ids in Segment, what happens when they enter an audience or have a computed trait?
Segment sends an identify or a track call for each external on the user’s account. For example, if a user has three email addresses, and you are sending identify calls for your audience, Engage sends three identify calls to Mixpanel and adds the latest email address to the user profile as the email “address of record” on the Mixpanel user profile.
What happens if I receive a Timestamp must be within the last 5 years error, and my timestamp displays 1970-01-01?
The Segment PHP Library (2.1.0) version requires a UNIX timestamp. If you send anything other than a UNIX timestamp, Segment converts this to the 1970-01-01 timestamp. If you’re experiencing failed events due to this error and you have a connected PHP source, update your PHP Library version to 2.1.0.
Settings
Segment lets you change these destination settings from the Segment app without having to touch any code.
| Setting | Description |
|---|---|
| API Secret | string. You can find your API Secret under Settings > Project Settings in the upper right of the Mixpanel interface. |
| Track All Pages to Mixpanel with a Consolidated Event Name | boolean, defaults to FALSE . This will track Loaded a Page events to Mixpanel for all page method calls and Loaded a Screen events for all screen method calls. |
| Cross Subdomain Cookie | boolean, defaults to TRUE . This will allow the Mixpanel cookie to persist between different pages of your application. |
| Enable European Union Endpoint | boolean, defaults to FALSE . Enable this setting to send your events to Mixpanel’s EU endpoint. In Mixpanel, be sure to enable Data Residency under Project Settings > Set up Mixpanel > Data Residency. |
| Events to increment in People | array, defaults to . If you want to see and segment by event counts and last event date in Mixpanel people, you will need to: 1. Enable the “Use Mixpanel People” setting. 2. List the events you want to see in People here. |
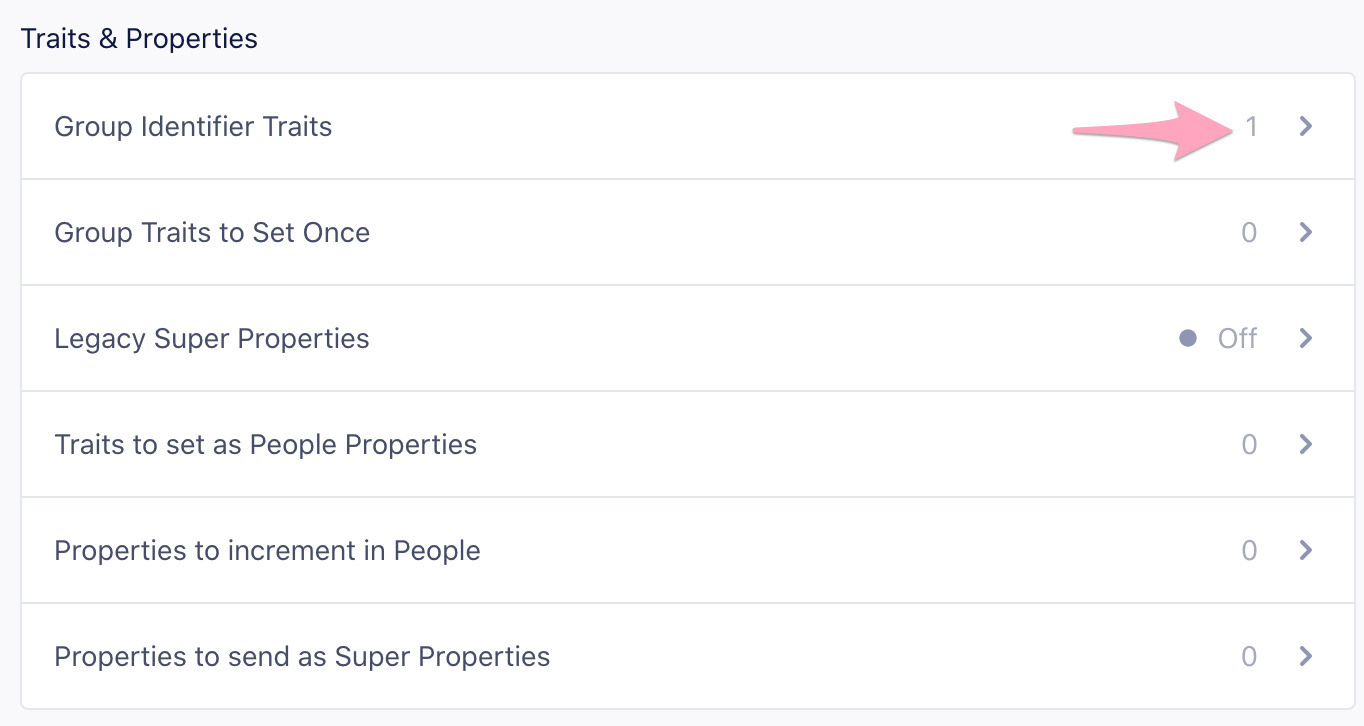
| Group Identifier Traits | array, defaults to . What trait Segment should use as your Mixpanel “group key” in group calls. If, for example, you set this to be company, then “company” will be sent as group_key and the value of traits["company"] will be sent as the group_id. |
| Group Traits to Set Once | array, defaults to . Group traits to be set only once using Mixpanel’s $set_once operator. |
| Legacy Super Properties | boolean, defaults to FALSE . We used to add $ to mixpanel traits as super properties. Enable this if you would like to use the legacy behavior. |
| Use Mixpanel People | boolean, defaults to TRUE . This will send all of your identify calls to Mixpanel’s People feature. |
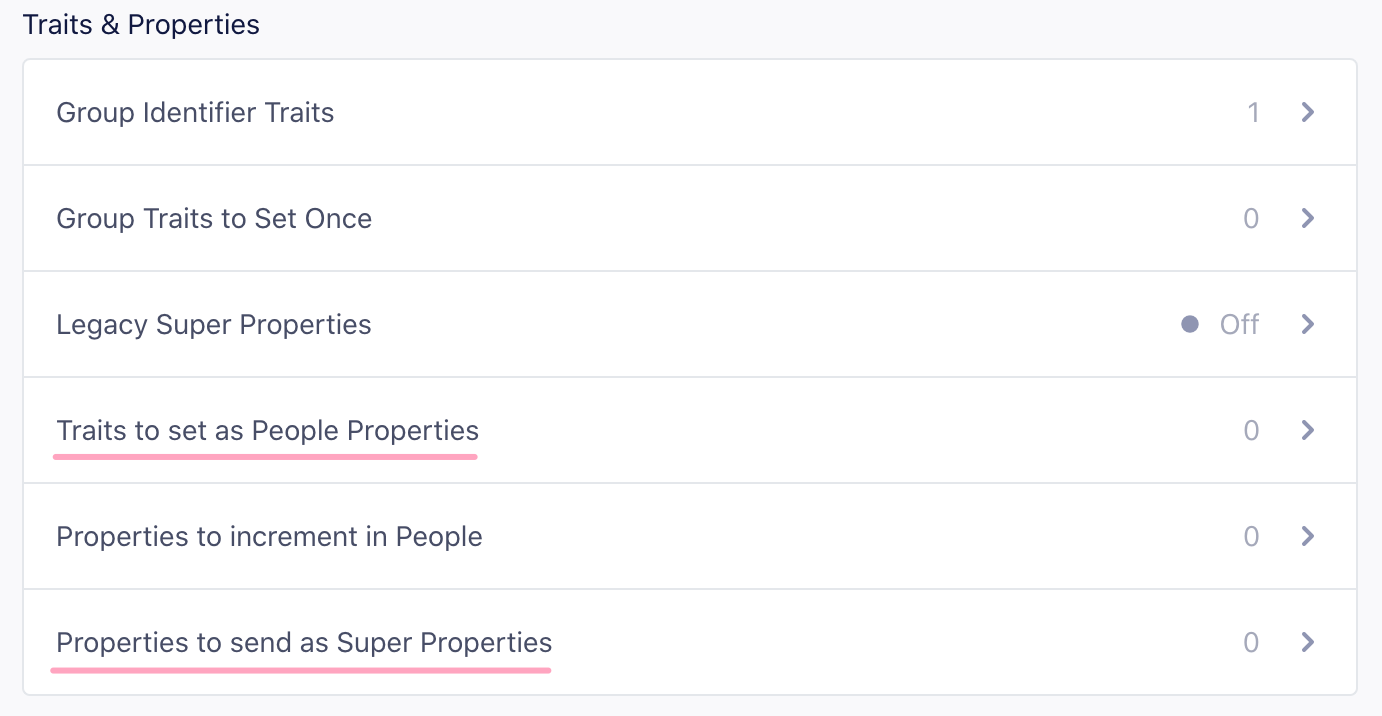
| Traits to set as People Properties | array, defaults to . If you only want to set specific traits as People Properties in Mixpanel People, you will need to: - Enable the “Use Mixpanel People” setting. - List the traits you want to see in People here. |
| Persistence Type | select, defaults to cookie. This will allow the Mixpanel cookie to persist between different pages of your application. |
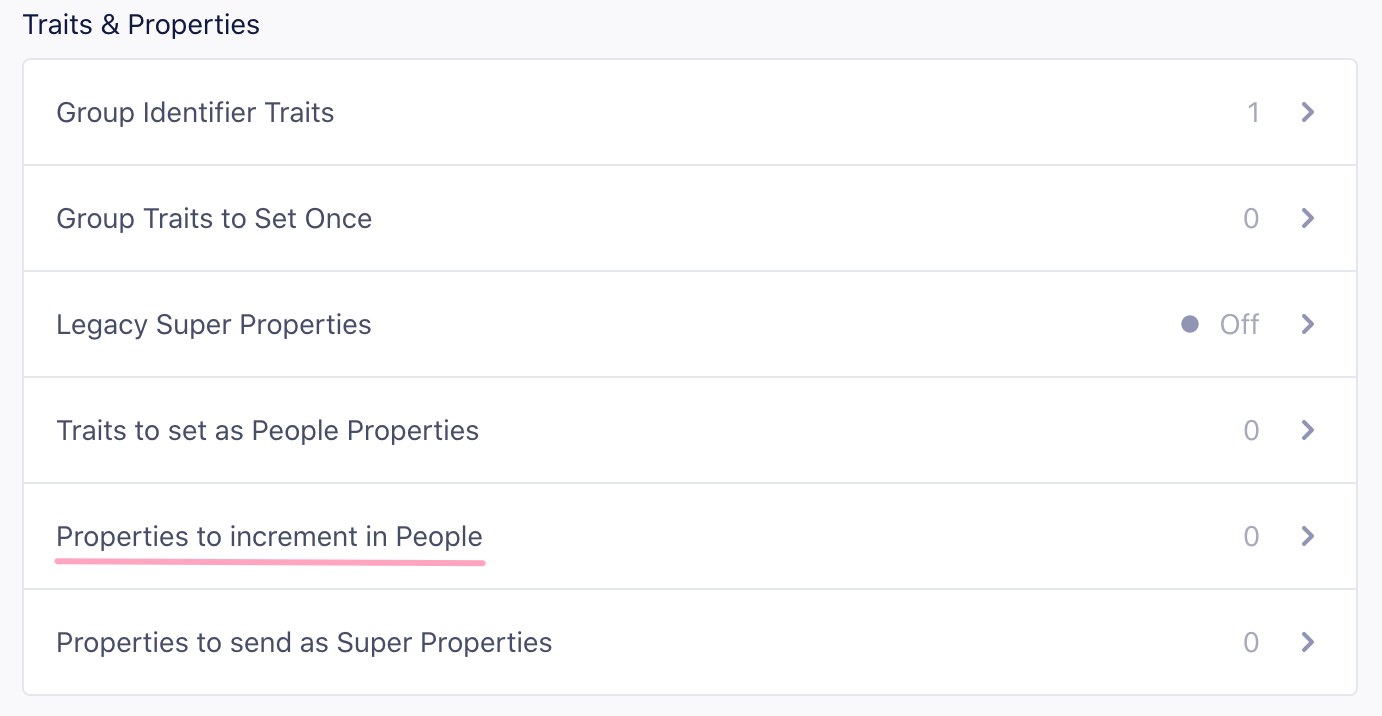
| Properties to increment in People | array, defaults to . If you want to see and segment by event counts and last event date in Mixpanel people, enable people, and then list the events you want to see in People here. |
| Secure Cookie | boolean, defaults to FALSE . This will mark the Mixpanel cookie as secure, meaning it will only be transmitted over https |
| Automatically set all Traits as Super Properties and People Properties | boolean, defaults to TRUE . While this is checked, our integration automatically sets all traits on identify calls as super properties and people properties if Mixpanel People is checked as well. |
| Source Name | string. This value, if it’s not blank, will be sent as segment_source_name to Mixpanel for every event/page/screen call. |
| Properties to send as Super Properties | array, defaults to . If you want to see and segment by Super Properties in Mixpanel, then list the properties you want to see as Super Properties here. |
| Token (required) |
string. You can find your token under Account in the upper-right of the Mixpanel interface. |
| Track All Pages to Mixpanel | boolean, defaults to FALSE . This will track Loaded a Page events to Mixpanel for all page method calls. We keep this disabled by default. |
| Track Categorized Pages to Mixpanel | boolean, defaults to FALSE . This will track events to Mixpanel for page method calls that have a category associated with them. For example page('Docs', 'Index') would translate to Viewed Docs Index Page. |
| Track Named Pages to Mixpanel | boolean, defaults to FALSE . This will track events to Mixpanel for page method calls that have a name associated with them. For example page('Signup') would translate to Viewed Signup Page. |
This page was last modified: 18 Mar 2024
Need support?
Questions? Problems? Need more info? Contact Segment Support for assistance!