Customer.io Destination
Destination Info
- Accepts Page, Identify, and Track calls
- Refer to it as Customer.io in the Integrations object
Components
- Browser
- Server
Connection Modes 
| Device-mode | Cloud-mode |
|---|---|
 Web Web |
Web |
 Mobile Mobile |
Mobile |
| Server |
Server |
Customer.io (Classic) is in Maintenance mode
The Customer.io (Classic) Destination has entered maintenance mode. Future updates are limited to security updates and bug fixes. A new version of this destination is available. See Customer.io (Actions)
Customer.io helps you send automated email, push, SMS, and webhooks based on your customers’ activities in your app or product. It makes conversion tracking, optimization and re-marketing easier. The analytics.js Customer.io Destination is open-source. You can browse the code on GitHub.
Good to know: This page is about the Customer.io Segment destination, which receives data from Segment. There’s also a page about the Customer.io Segment source, which sends data to Segment!
Getting Started
You can follow the setup guide through Segment using the steps below, or you can automatically sync your Customer.io connection settings to your Segment source using the flow in your Customer.io workspace’s Integrations page.
- From the Segment web app, click Connections > Destinations.
- Search for “Customer.io”, select it, and then click Configure Customer.io.
- Select the data sources you want to connect to Customer.io and click Next.
- Enter your Destination Name and select your Connection Mode—Cloud Mode or Device Mode. Click Save.
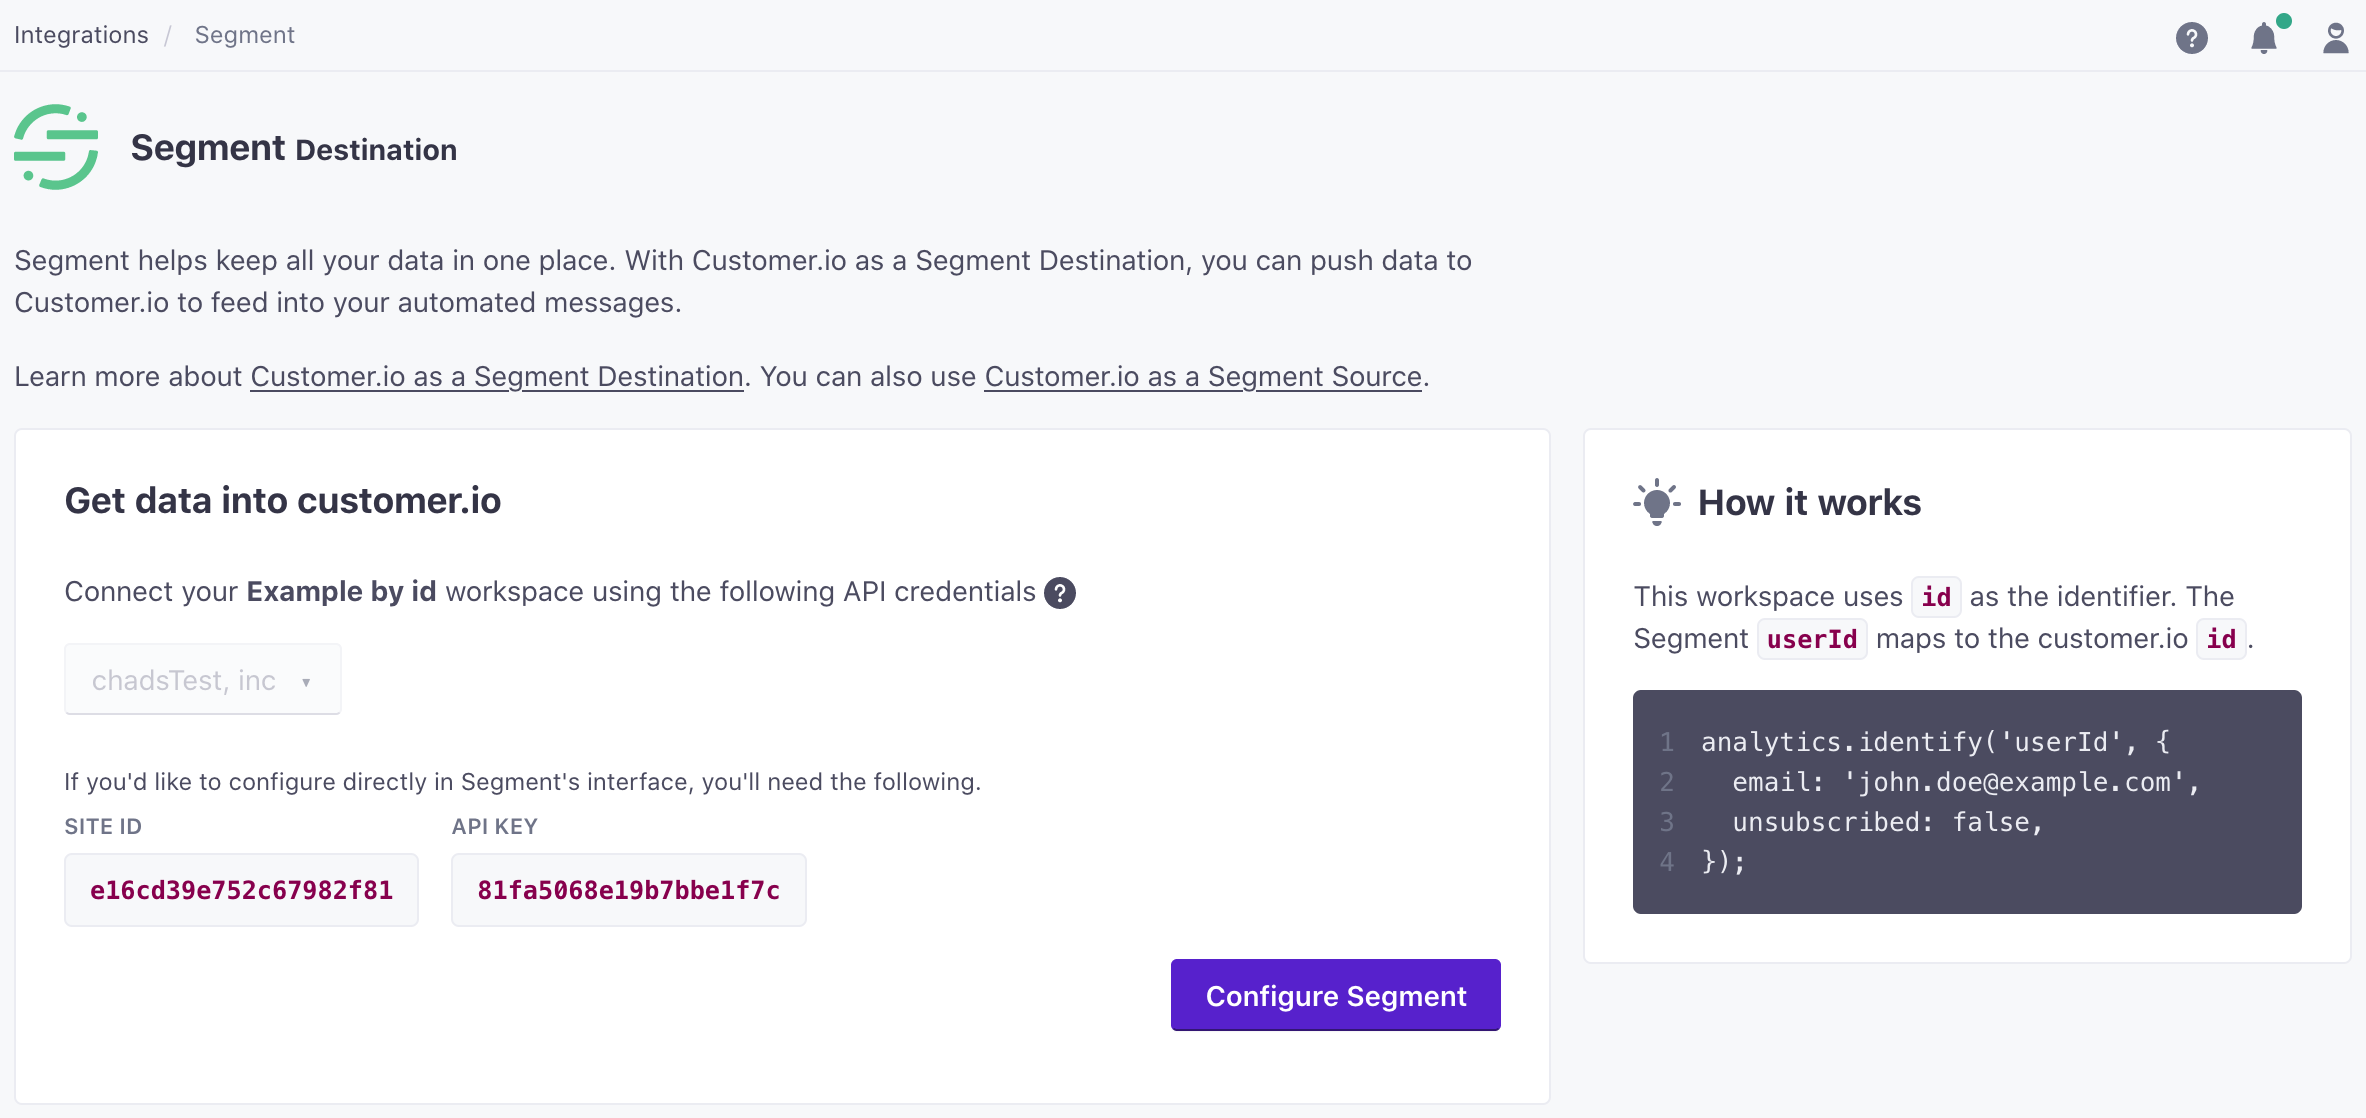
- Under Connection Settings, enter your Customer.io workspace API Key and Site ID. You’ll find both in your Customer.io Account Settings > API Credentials page.
If you want to sync your settings directly from your Customer.io workspace, go to Settings > Integrations and find the Segment Destination integration.
Page
If you’re not familiar with the Segment Specs, take a look to understand what the Page method does. An example call would look like:
analytics.page();
Page events send to Customer.io as a Page View event where names and properties are optional. In the Customer.io “Activity Logs”, the event will have “Activity Type” set to “Page View” and “Activity Name” set to the page name. If there is no page name, “Activity Name” defaults to the page URL.
Screen
If you’re not familiar with the Segment Specs, take a look to understand what the Screen method does. An example call would look like:
[[SEGAnalytics sharedAnalytics] screen:@"Home"];
Screen events send to Customer.io as a custom event. In the Customer.io “Activity Logs”, “Activity Type” is event and “Activity Value” sets to Viewed {screen name} Screen. For the earlier example the “Activity Value” will be Viewed Home Screen. If there is no screen name, then “Activity Value” will be Viewed Undefined Screen.
Identify
If you’re not familiar with the Segment Specs, take a look to understand what the Identify method does. An example call looks like this:
analytics.identify('userId123', {
  email: 'john.doe@example.com'
});
When you identify a new user, Customer.io adds the user to your Customer.io workspace. If the user exists, the identify request updates the existing person’s attributes.
If your Customer.io workspace supports both email and id as identifiers (the default setting as of June 2021), you can identify people either by a database identifier (called id in Customer.io) or the email trait.
This provides a path to identify people who enter your system as leads (by email) and then assign them an ID in Customer.io when they become a customer or user.
- If you don’t have an ID, pass a person’s email address as the
userIdin the identify call. Customer.io maps this value to a person’semailattribute. - If you have an ID, set the
userIdin the identify call to the person’s ID and passemailas a trait. This sets both a person’sidandemailattributes in Customer.io. If you previously identified a person byemail, your request updates that person and assigns them anid.
Updating people
When Customer.io recognizes either the id or email in your request, your identify request updates that person.
analytics.identify('userId123', {
  email: 'john.doe@example.com',
  fav_food: 'pizza'
});
If you want to change the id or email you’ve assigned a person in Customer.io, you have to pass a person’s cio_id, in the format cio_<cio_id value> as the userId in your identify call. Currently, you must retrieve this value from a person’s page in the Customer.io interface. In the future, you’ll be able to do that using this call from Customer.io API.
analytics.identify('cio_<cio_id value>', {
  email: 'new.email@example.com',
  id: 'new-id-value'
});
Unsubscribing Users
To unsubscribe a user, simply pass unsubscribed: true in an identify call. Be sure the id and/or email values match the values in Customer.io. You can find these values in Customer.io by selecting a person on the People page, and clicking Attributes. Here is an example that unsubscribes a user:
analytics.identify('userId123', {
    email: 'john.doe@example.com',
    unsubscribed: true
  }
)
Identifying people in workspaces that only support ID
In older workspaces, or workspaces using Customer.io’s “classic” settings, you can only identify people by ID.
You do not need to pass an email address unless you want to send emails. If you want to send emails, you must provide the email address as a trait labeled email.
Track
If you’re not familiar with the Segment Specs, take a look to understand what the Track method does. An example call would look like:
analytics.track('Clicked Button');
Track events send to Customer.io as custom events. In the Customer.io “Activity Logs”, “Activity Type” sets to event and “Activity Name” sets to the event name.
Device token setup
Set device.token before you send the Application Installed, Application Uninstalled, or Application Opened events to Segment. For more on why you’d want to send device.token, see Customer.io’s device token documentation. You’ll likely need to extract this value from your push notification provider.
For that, you need to make the following calls:
- For Android, you need to make a call to
putDeviceTokenwhen Segment client initializes.- Read more here for adding tokens for Android devices
- For iOS, you need to make a call to
segment.registeredForRemoteNotificationswhen you receive thedidRegisterForRemoteNotificationsWithDeviceTokenevent.- Read more here for adding tokens for iOS devices
Application Installed
Application Installed events will add or update a device in the person’s Customer.io profile using this API endpoint. Note, you must pass a device token in your event payload using a context.device.token property. See more on Contextual properties here.
{
"action": "track",
"userId": "019mr8mf4r",
"event": "Application Installed",
"properties": {
  "version": "1.2.3",
  "build": 1234
},
"context": {
  "device": {
    "token": "ff15bc0c20c4aa6cd50854ff165fd265c838e5405bfeb9571066395b8c9da449",
    "type": "ios"
  }
}
}
Application Opened
Application Opened events will add or update a device in the person’s Customer.io profile using the same endpoint as above. If a device already exists, Customer.io will update its last_used_at timestamp. Again, make sure you pass a device token in your event payload using a context.device.token property. See more on Contextual properties.
{
"action": "track",
"userId": "019mr8mf4r",
"event": "Application Opened",
"properties": {
  "version": "1.2.3",
  "build": 1234
},
"context": {
  "device": {
    "token": "ff15bc0c20c4aa6cd50854ff165fd265c838e5405bfeb9571066395b8c9da449",
    "type": "ios"
  }
}
}
Application Uninstalled
Application Uninstalled events will remove the device from the person’s Customer.io profile using this API endpoint. Note, you must pass a device token in your event payload using a context.device.token property. See more on Contextual properties.
{
"action": "track",
"userId": "019mr8mf4r",
"event": "Application Uninstalled",
"properties": {
  "version": "1.2.3",
  "build": 1234
},
"context": {
  "device": {
    "token": "ff15bc0c20c4aa6cd50854ff165fd265c838e5405bfeb9571066395b8c9da449",
    "type": "ios"
  }
}
}
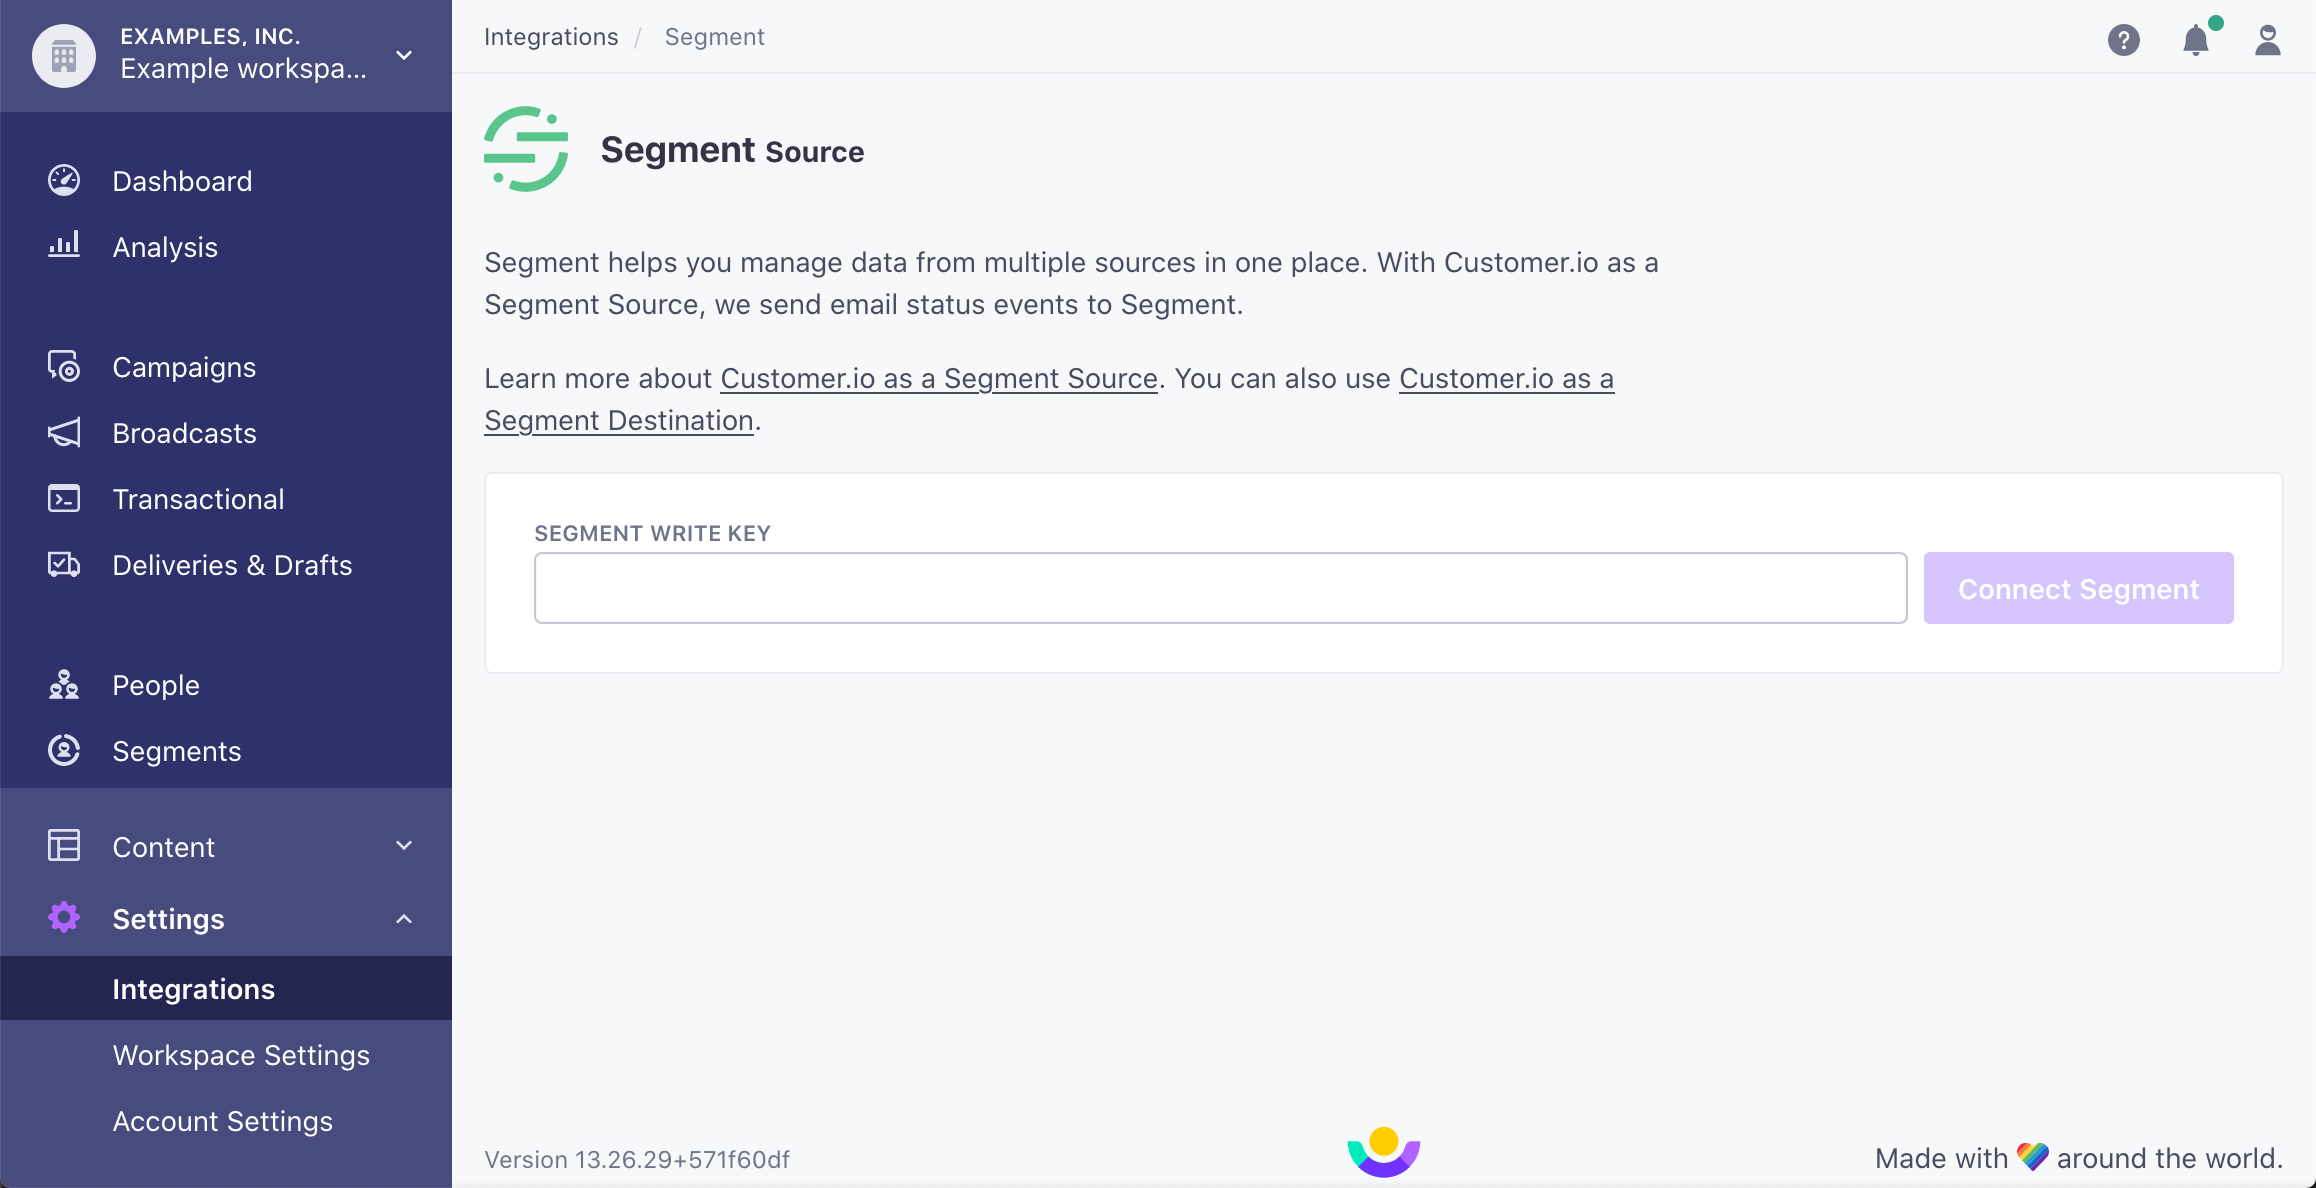
Sending Data from Customer.io
You can enable Customer.io as a Segment Source to send email events to other tools on the Segment platform. These events are sent as track calls to the other destinations you’ve turned on.
To enable this feature:
- In Customer.io go to Settings > Integrations.
- Find the Segment Source integration.
- Add your Segment Write Key and click Connect Segment.
Best Practices
Rate Limits
Customer.io has limits on the data collected by their API. To ensure your events arrive in Customer.io, make sure that you’re respecting the limits placed on the Customer.io API. If you’re using Segment’s HTTP API to send a batch of events to Customer.io at once, make sure you throttle the import to 100-200 requests per second.
Troubleshooting
No Events in Customer.io from the Browser
Remember that before Segment can send events to Customer.io from client-side JavaScript, the current user must identify with their userId. The user’s email address is only used to identify them if that is the ID on record for them in Customer.io.
Verify that your Customer.io workspace doesn’t have any filters configured, as these filters could prevent campaigns from triggering.
Page events not associated with user
Page events will associate to a user if the user has been previously identified in Customer.io. If you identify a user after making Page calls, the previous page events won’t associate to the user in Customer.io.
Engage
You can send computed traits and audiences generated using Engage to this destination as a user property.
For user-property destinations, an identify call sends to the destination for each user that’s added and removed. The property name is the snake_cased version of the audience name, with a true/false value to indicate membership. For example, when a user first completes an order in the last 30 days, Engage sends an Identify call with the property order_completed_last_30days: true. When the user no longer satisfies this condition (for example, it’s been more than 30 days since their last order), Engage sets that value to false.
Customer.io requires you to pass an identifier value (ID or email, depending on your workspace settings), when you sync Audiences or Computed Traits.
When you first create an audience, Engage sends an Identify call for every user in that audience. Later audience syncs only send updates for users whose membership has changed since the last sync.
Settings
Segment lets you change these destination settings from the Segment app without having to touch any code.
| Setting | Description |
|---|---|
| API Key | string. You can find your API Key in Customer.io > Integrations > Segment Destination. It should be 20 or 64 characters long, and look something like this: 91837a6c9e8b49d0ef71. An API Key is required if you’re using our server-side or mobile libraries. For more details you can view the Customer.io Docs. |
| Convert To Unix Time | boolean, defaults to TRUE . If true, timestamps are converted to Unix Time. |
| Customer.io Datacenter | select. Choose your Customer.io gateway for data residency. |
| Site ID (required) |
string. You can find your Site ID on the Customer.io Integration page. |
This page was last modified: 27 Oct 2023
Need support?
Questions? Problems? Need more info? Contact Segment Support for assistance!