Destination Functions
Destination functions allow you to transform and annotate your Segment events and send them to any external tool or API without worrying about setting up or maintaining any infrastructure.
All functions are scoped to your workspace, so members of other workspaces can’t view or use them.
Functions is available to all customer plan types with a free allotment of usage hours. Read more about Functions usage limits, or see your workspace’s Functions usage stats.

Destination functions doesn’t accept data from Object Cloud sources.
Create a destination function
- From your workspace, go to Connections > Catalog and click the Functions tab.
- Click New Function.
- Select Destination as the function type and click Build.
After you click Build, a code editor appears. Use the editor to write the code for your function, configure settings, and test the function’s behavior.
Tip: Want to see some example functions? Check out the templates available in the Functions UI, or in the open-source Segment Functions Library. (Contributions welcome!)
Code the destination function
Segment invokes a separate part of the function (called a “handler”) for each event type that you send to your destination function.
Your function isn’t invoked for an event if you’ve configured a destination filter, and the event doesn’t pass the filter.
The default source code template includes handlers for all event types. You don’t need to implement all of them - just use the ones you need, and skip the ones you don’t.
Destination functions can define handlers for each message type in the Segment spec:
onIdentifyonTrackonPageonScreenonGrouponAliasonDeleteonBatch
Each of the functions above accepts two arguments:
- event - Segment event object, where fields and values depend on the event type. For example, in “Identify” events, Segment formats the object to match the Identify spec.
- settings - Set of settings for this function.
The example below shows a destination function that listens for “Track” events, and sends some details about them to an external service.
async function onTrack(event) {
  await fetch('https://example-service.com/api', {
    method: 'POST',
    headers: {
      'Content-Type': 'application/json'
    },
    body: JSON.stringify({
      event_name: event.event,
      event_properties: event.properties,
      timestamp: event.timestamp
    })
  })
}
To change which event type the handler listens to, you can rename it to the name of the message type. For example, if you rename this function onIdentify, it listens for “Identify” events instead.
Functions’ runtime includes a fetch() polyfill using a node-fetch package. Check out the node-fetch documentation for usage examples.
Errors and error handling
Segment considers a function’s execution successful if it finishes without error. You can also throw an error to create a failure on purpose. Use these errors to validate event data before processing it, to ensure the function works as expected.
You can throw the following pre-defined error types to indicate that the function ran as expected, but that data was not deliverable:
EventNotSupportedInvalidEventPayloadValidationErrorRetryError
The examples show basic uses of these error types.
async function onGroup(event) {
  if (!event.traits.company) {
    throw new InvalidEventPayload('Company name is required')
  }
}

async function onPage(event) {
  if (!event.properties.pageName) {
    throw new ValidationError('Page name is required')
  }
}

async function onAlias(event) {
  throw new EventNotSupported('Alias event is not supported')
}

async function onTrack(event) {
  let res
  try {
    res = await fetch('http://example-service.com/api', {
      method: 'POST',
      headers: {
        'Content-Type': 'application/json'
      },
      body: JSON.stringify({ event })
    })
  } catch (err) {
    // Retry on connection error
    throw new RetryError(err.message)
  }
  if (res.status >= 500 || res.status === 429) {
    // Retry on 5xx and 429s (ratelimits)
    throw new RetryError(`HTTP Status ${res.status}`)
  }
}
If you don’t supply a function for an event type, Segment throws an EventNotSupported error by default.
You can read more about error handling below.
Runtime and dependencies
On March 26, 2024, Segment is upgrading the Functions runtime environment to Node.js v18, which is the current long-term support (LTS) release.
This upgrade keeps your runtime current with industry standards. Based on the AWS Lambda and Node.js support schedule, Node.js v16 is no longer in Maintenance LTS. Production applications should only use releases of Node.js that are in Active LTS or Maintenance LTS.
All new functions will use Node.js v18 starting March 26, 2024.
For existing functions, this change automatically occurs as you update and deploy an existing function. Segment recommends that you check your function post-deployment to ensure everything’s working. Your function may face issues due to the change in sytax between different Node.js versions and dependency compatibility.
Limited time opt-out option
If you need more time to prepare, you can opt out of the update before March 19, 2024.
Note that if you opt out:
- The existing functions will continue working on Node.js v16.
- You won’t be able to create new functions after July 15, 2024.
- You won’t be able to update existing functions after August 15, 2024.
- You won’t receive future bug fixes, enhancements, and dependency updates to the functions runtime.
Contact Segment to opt-out or with any questions.
Node.js 18
Segment strongly recommends updating to Node.js v18 to benefit from future runtime updates, the latest security, and performance improvements.
Functions do not currently support importing dependencies, but you can contact Segment Support to request that one be added.
The following dependencies are installed in the function environment by default.
atob v2.1.2exposed asatobaws-sdk v2.488.0exposed asAWSbtoa v1.2.1exposed asbtoafetch-retryexposed asfetchretrylib.fetchretryform-data v2.4.0exposed asFormData@google-cloud/automl v2.2.0exposed asgoogle.cloud.automl@google-cloud/bigquery v5.3.0exposed asgoogle.cloud.bigquery@google-cloud/datastore v6.2.0exposed asgoogle.cloud.datastore@google-cloud/firestore v4.4.0exposed asgoogle.cloud.firestore@google-cloud/functions v1.1.0exposed asgoogle.cloud.functions@google-cloud/pubsub v2.6.0exposed asgoogle.cloud.pubsub@google-cloud/storage v5.3.0exposed asgoogle.cloud.storage@google-cloud/tasks v2.6.0exposed asgoogle.cloud.taskshubspot-api-nodejsexposed ashubspotlib.hubspotjsforce v1.11.0exposed asjsforcejsonwebtoken v8.5.1exposed asjsonwebtokenlibphonenumber-jsexposed aslibphonenumberjslib.libphonenumberjslodash v4.17.19exposed as_mailchimp marketingexposed asmailchimplib.mailchimpmailjetexposed asconst mailJet = nodemailjet.nodemailjet;moment-timezone v0.5.31exposed asmomentnode-fetch v2.6.0exposed asfetchoauth v0.9.15exposed asOAuth@sendgrid/client v7.4.7exposed assendgrid.client@sendgrid/mail v7.4.7exposed assendgrid.mailskyflowexposed asskyflowlib.skyflowstripe v8.115.0exposed asstripetwilio v3.68.0exposed astwiliouuidv5 v1.0.0exposed asuuidv5.uuidv5winston v2.4.6exposed asconst winston = winstonlib.winstonxml v1.0.1exposed asxmlxml2js v0.4.23exposed asxml2js-
zlib v1.0.5exposed aszlib.zlib
uuidv5is exposed as an object. Useuuidv5.uuidv5to access its functions. For example:async function onRequest(request, settings) { uuidv5 = uuidv5.uuidv5; console.log(typeof uuidv5); //Generate a UUID in the default URL namespace var urlUUID = uuidv5('url', 'http://google/com/page'); console.log(urlUUID); //Default DNS namespace var dnsUUID = uuidv5('dns', 'google.com'); console.log(dnsUUID); }zlib’s asynchronous methodsinflateanddeflatemust be used withasyncorawait. For example:zlib = zlib.zlib; // Required to access zlib objects and associated functions async function onRequest(request, settings) { const body = request.json(); const input = 'something'; // Calling inflateSync method var deflated = zlib.deflateSync(input); console.log(deflated.toString('base64')); // Calling inflateSync method var inflated = zlib.inflateSync(new Buffer.from(deflated)).toString(); console.log(inflated); console.log('Done'); }
The following Node.js modules are available:
cryptoNode.js module exposed ascrypto.httpsNode.js module exposed ashttps.
Other built-in Node.js modules aren’t available.
For more information on using the aws-sdk module, see how to set up functions for calling AWS APIs.
Caching
Basic cache storage is available through the cache object, which has the following methods defined:
cache.load(key: string, ttl: number, fn: async () => any): Promise<any>- Obtains a cached value for the provided
key, invoking the callback if the value is missing or has expired. Thettlis the maximum duration in milliseconds the value can be cached. If omitted or set to-1, the value will have no expiry.
- Obtains a cached value for the provided
cache.delete(key: string): void- Immediately remove the value associated with the
key.
- Immediately remove the value associated with the
Some important notes about the cache:
- When testing functions in the code editor, the cache will be empty because each test temporarily deploys a new instance of the function.
- Values in the cache are not shared between concurrently-running function instances; they are process-local which means that high-volume functions will have many separate caches.
- Values may be expunged at any time, even before the configured TTL is reached. This can happen due to memory pressure or normal scaling activity. Minimizing the size of cached values can improve your hit/miss ratio.
- Functions that receive a low volume of traffic may be temporarily suspended, during which their caches will be emptied. In general, caches are best used for high-volume functions and with long TTLs. The following example gets a JSON value through the cache, only invoking the callback as needed:
const ttl = 5 * 60 * 1000 // 5 minutes
const val = await cache.load("mycachekey", ttl, async () => {
    const res = await fetch("http://echo.jsontest.com/key/value/one/two")
    const data = await res.json()
    return data
})
Create settings and secrets
Settings allow you to pass configurable variables to your function, which is the best way to pass sensitive information such as security tokens. For example, you might use settings as placeholders to use information such as an API endpoint and API key. This way, you can use the same code with different settings for different purposes. When you deploy a function in your workspace, you are prompted to fill out these settings to configure the function.
First, add a setting in Settings tab in the code editor:
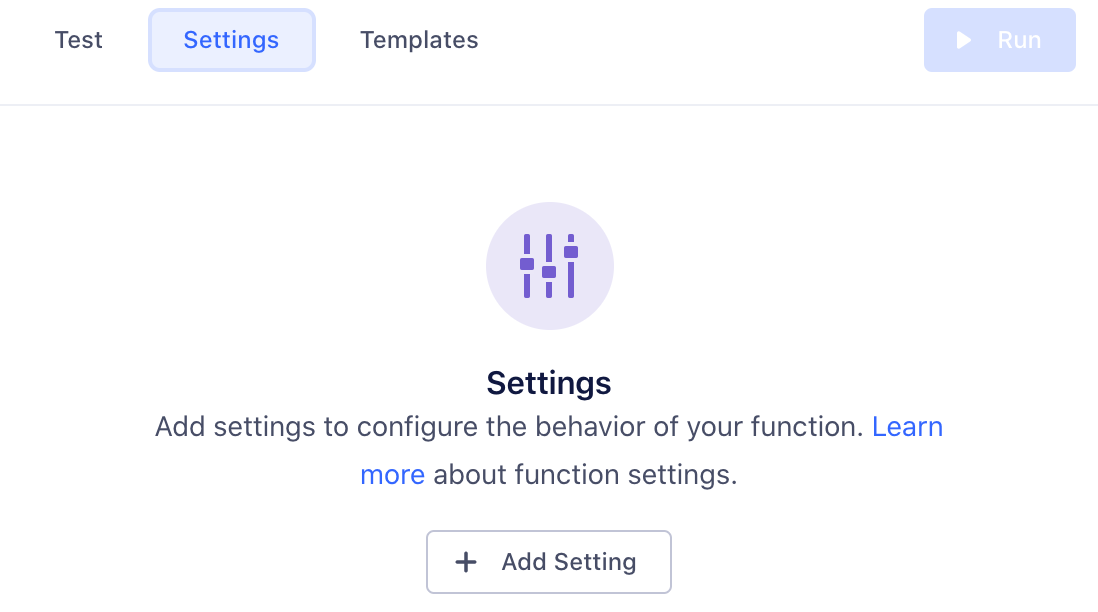
Click Add Setting to add your new setting.
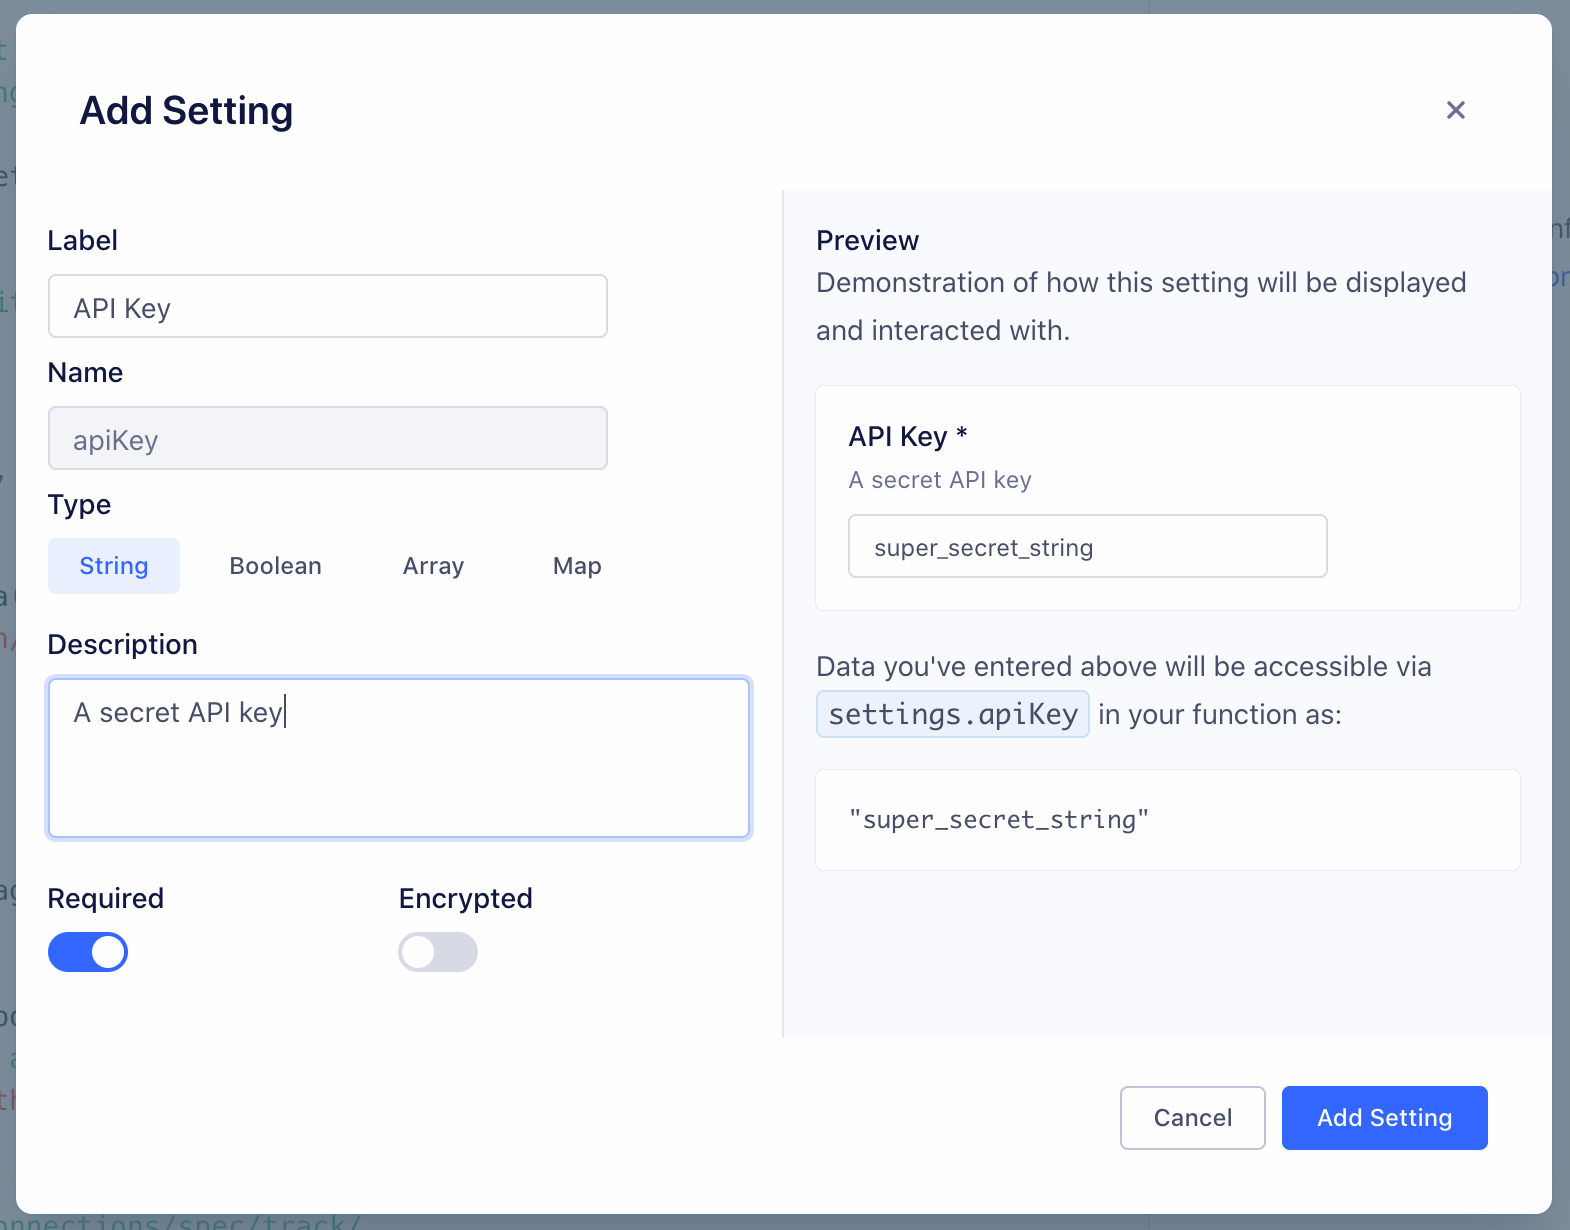
You can configure the details about this setting, which change how it’s displayed to anyone using your function:
- Label - Name of the setting, which users see when configuring the function.
- Name - Auto-generated name of the setting to use in function’s source code.
- Type - Type of the setting’s value.
- Description - Optional description, which appears below the setting name.
- Required - Enable this to ensure that the setting cannot be saved without a value.
- Encrypted - Enable to encrypt the value of this setting. Use this setting for sensitive data, like API keys.
As you change the values, a preview to the right updates to show how your setting will look and work.
Click Add Setting to save the new setting.
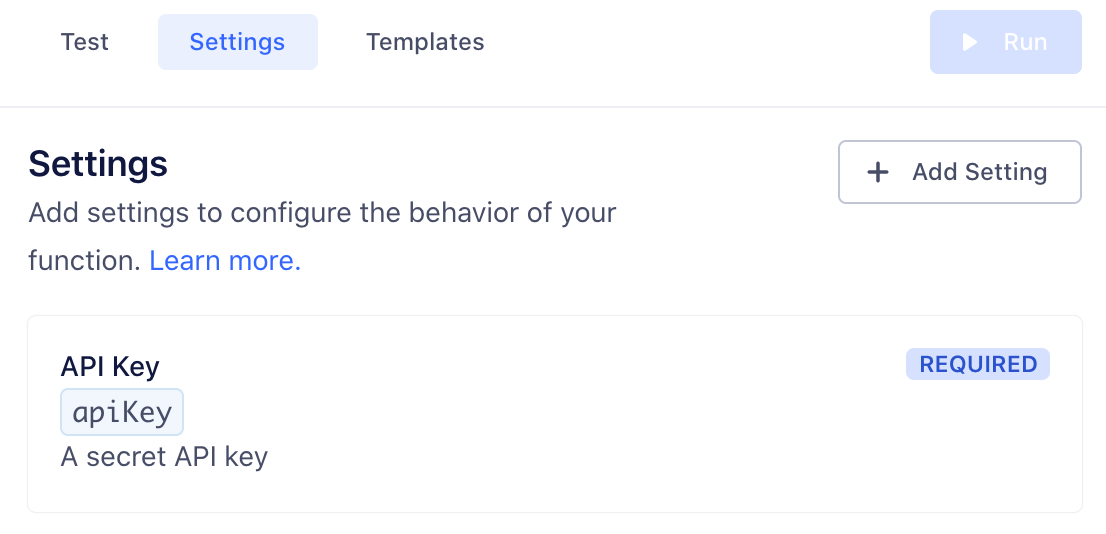
Once you save a setting, it appears in the Settings tab for the function. You can edit or delete settings from this tab.
Next, fill out this setting’s value in the Test tab, so you can run the function and verify that the correct setting value is passed. (This value is only for testing your function.)
Now that you’ve configured a setting and entered a test value, you can add code to read its value and run the function, as in the example below:
async function onTrack(request, settings) {
  const apiKey = settings.apiKey
  //=> "super_secret_string"
}
When you deploy your destination function in your workspace, you fill out the settings on the destination configuration page, similar to how you would configure a normal destination.
You must pass the settings object to the function at runtime. Functions can’t access the settings object when it’s stored as a global variable.
Test the destination function
You can test your code directly from the editor in two ways:
Use sample events for testing
Click Use Sample Event and select the source to use events from.

Click Run to test your function with the event you selected.
Test using manual input
You can also manually include your own JSON payload of a Segment event, instead of fetching a sample from one of your workspace sources.

If your function fails, you can check the error details and logs in the Output section.
- Error Message - This shows the error surfaced from your function.
- Logs - This section displays any messages to
console.log()from the function.
Batching the destination function
Batch handlers are an extension of destination functions. When you define an onBatch handler alongside the handler functions for single events (for example: onTrack or onIdentity), you’re telling Segment that the destination function can accept and handle batches of events.
Batching is available for destination and destination insert functions only.
When to use batching
Consider creating a batch handler if:
- Your function sends data to a service that has a batch endpoint. Batch endpoints may allow you both to send more data downstream and stay within the rate limits imposed by the service. Batch handlers that use one or more batch endpoints improve the efficiency of the function, and enable it to scale more easily. Specifically, you can use batch handlers to build list-based Engage destinations.
- You have a high-throughput function and want to reduce cost. When you define a batch handler, Segment invokes the function once per batch, rather than once per event. As long as the function’s execution time isn’t adversely affected, the reduction in invocations should lead to a reduction in cost.
If a batched function receives too low a volume of events (under one event per second) to be worth batching, Segment may not invoke the batch handler.
Define the batch handler
Segment collects the events over a short period of time and combines them into a batch. The system flushes them when the batch reaches a certain number of events, or when the batch has been waiting for a specified wait time.
To create a batch handler, define an onBatch function within your destination function.
You can also use the “Default Batch” template found in the Functions editor to get started quickly.
async function onBatch(events, settings){
  // handle the batch of events
}
The onBatch handler is an optional extension. Destination functions must still contain single event handlers as a fallback, in cases where Segment does not receive enough events to execute the batch.
The handler function receives an array of events. The events can be of any supported type and a single batch may contain more than one event type. Handler functions can also receive function settings. Here is an example of what a batch can look like:
[
    {
      "type": "identify",
      "userId": "019mr8mf4r",
      "traits": {
        "email": "jake@yahoo.com",
        "name": "Jake Peterson",
        "age": 26
      }
    },
    {
      "type": "track",
      "userId": "019mr8mf4r",
      "event": "Song Played",
      "properties": {
        "name": "Fallin for You",
        "artist": "Dierks Bentley"
      }
    },
    {
      "type": "track",
      "userId": "971mj8mk7p",
      "event": "Song Played",
      "properties": {
        "name": "Get Right",
        "artist": "Jennifer Lopez"
      }
    }
]
For example, you could send the array of events to an external services batch endpoint:
async function onBatch(events, settings) {
  await fetch('https://example-service.com/batch-api', {
    method: 'POST',
    headers: {
      'Content-Type': 'application/json'
    },
    body: JSON.stringify(events) // send a JSON array
  })
}
Configure the event types within a batch
Segment batches together any event of any type that it sees over a short period of time to increase batching efficiency and give you the flexibility to decide how batches are created. If you want to split batches by event type, you can implement this in your functions code by writing a handler.
If your downstream endpoint requires events of a single type, you can write a handler that groups events by type, and then handles the events.
async function onBatch(events, settings) {
  // group events by type
  const eventsByType = {}
  for (const event of events) {
    if (!(event.type in eventsByType)) {
      eventsByType[event.type] = []
    }
    eventsByType[event.type].push(event)
  }

  // concurrently process sub-batches of a specific event type
  const promises = Object.entries(eventsByType).map(([type, events]) => {
    switch (type) {
    case 'track':
      return onTrackBatch(events, settings)
    case 'identify':
      return onIdentifyBatch(events, settings)
    // ...handle other event types here...
    }
  })
  return Promise.all(promises)
}

async function onTrackBatch(events, settings) {
  // handle a batch of track events
}

async function onIdentifyBatch(events, settings) {
  // handle a batch of identify events
}
Configure your batch parameters
By default, Functions waits up to 10 seconds to form a batch of 20 events. You can increase the number of events included in each batch (up to 400 events per batch) by contacting Segment support. Segment recommends users who wish to include fewer than 20 events per batch use destination functions without the onBatch handler.
Test the batch handler
The Functions editing environment supports testing batch handlers.
To test the batch handler:
- In the right panel of the Functions editor, click customize the event yourself to enter Manual Mode.
- Add events as a JSON array, with one event per element.
- Click Run to preview the batch handler with the specified events.
The Sample Event option tests single events only. You must use Manual Mode to add more than one event so you can test batch handlers.
The editor displays logs and request traces from the batch handler.
The Public API Functions/Preview endpoint also supports testing batch handlers. The payload must be a batch of events as a JSON array.
Handling batching errors
Standard function error types apply to batch handlers. Segment attempts to retry the batch in the case of Timeout or Retry errors. For all other error types, Segment discards the batch. It’s also possible to report a partial failure by returning status of each event in the batch. Segment retries only the failed events in a batch until those events are successful or until they result in a permanent error.
[
	{
		"status": 200
	},
	{
		"status": 400,
		"errormessage": "Bad Request"
	},
	{
		"status": 200
	},
	{
		"status": 500,
		"errormessage": "Error processing request"
	},
	{
		"status": 500,
		"errormessage": "Error processing request"
	},
	{
		"status": 200
	},
]
For example, after receiving the responses above from the onBatch handler, Segment only retries event_4 and event_5.
| Error Type | Result |
|---|---|
| Bad Request | Discard |
| Invalid Settings | Discard |
| Message Rejected | Discard |
| RetryError | Retry |
| Timeout | Retry |
| Unsupported Event Type | Discard |
Save and deploy the function
Once you finish building your destination function, click Configure to name it, then click Create Function to save it.
Once you do that, the destination function appears on the Functions page in your workspace’s catalog.
If you’re editing an existing function, you can Save changes without updating instances of the function that are already deployed and running.
You can also choose to Save & Deploy to save the changes, and then choose which of the already-deployed functions to update with your changes. You might need additional permissions to update existing functions.
Destination functions logs and errors
If your function throws an error, execution halts immediately. Segment captures the event, any outgoing requests/responses, any logs the function might have printed, as well as the error itself.
Segment then displays the captured error information in the Event Delivery page for your destination. You can use this information to find and fix unexpected errors.
You can throw an error or a custom error and you can also add helpful context in logs using the console API. For example:
async function onTrack(event, settings) {
  const userId = event.userId

  console.log('User ID is', userId)

  if (typeof userId !== 'string' || userId.length < 8) {
    throw new ValidationError('User ID is invalid')
  }

  console.log('User ID is valid')
}
Warning: Do not log sensitive data, such as personally-identifying information (PII), authentication tokens, or other secrets. Avoid logging entire request/response payloads. The Function Logs tab may be visible to other workspace members if they have the necessary permissions.
Caching in destination functions
Functions execute only in response to incoming data, but the environments that functions run in are generally long-running. Because of this, you can use global variables to cache small amounts of information between invocations. For example, you can reduce the number of access tokens you generate by caching a token, and regenerating it only after it expires. Segment cannot make any guarantees about the longevity of environments, but by using this strategy, you can improve the performance and reliability of your Functions by reducing the need for redundant API requests.
This example code fetches an access token from an external API and refreshes it every hour:
const TOKEN_EXPIRE_MS = 60 * 60 * 1000 // 1 hour
let token = null
async function getAccessToken () {
  const now = new Date().getTime()
  if (!token || now - token.ts > TOKEN_EXPIRE_MS) {
    const resp = await fetch('https://example.com/tokens', {
      method: 'POST'
    }).then(resp => resp.json())
    token = {
      ts: now,
      value: resp.token
    }
  }
  return token.value
}
Managing destination functions
Functions permissions
Functions have specific roles which can be used for access management in your Segment workspace.
Access to functions is controlled by two permissions roles:
- Functions Admin: Create, edit, and delete all functions, or a subset of specified functions.
- Functions Read-only: View all functions, or a subset of specified functions.
You also need additional Source Admin permissions to enable source functions, connect destination functions to a source, or to deploy changes to existing functions.
Editing and deleting functions
If you are a Workspace Owner or Functions Admin, you can manage your function from the Functions page.
Monitoring destination functions
You can use Destination Event Delivery to understand if Segment encounters any issues delivering your source data to destinations. Errors that the Function throws appear here.
If any of your deployed function instances are failing consistently, they will also appear in Connection Health.
Data control
In addition to using Destination Filters and the Privacy Portal to manage which events and properties are sent to your destination function, you can reference the destination function directly in the integrations object of the Segment payload. For example:
...
"integrations": {
  "All": false,
  "Amplitude": true,
  "Customer.io": true,
  "Google Analytics": true,
  "My Destination Function (My Workspace)": true
}
...
In the example above, the integrations object directly references and enables the destination function (My Destination Function), located inside your workspace (My Workspace). Include the workspace name in parentheses, as shown in the example above. Like all items in the integration object, destination function and workspace names are case sensitive.
Destination functions FAQs
Can I see who made changes to a function?
Yes, Functions access is logged in the Audit Trail, so user activity related to functions appears in the logs.
Does Segment retry failed function invocations?
Yes, Segment retries invocations that throw RetryError or Timeout errors (temporary errors only). Segment’s internal system retries failed functions API calls for four hours with a randomized exponential backoff after each attempt. This substantially improves delivery rates.
Retries work the same for both functions and cloud-mode destinations in Segment.
Are events guaranteed to send data in order?
No, Segment can’t guarantee the order in which the events are delivered to an endpoint.
Can I create a device-mode destination?
No, destination functions are currently available as cloud-mode destinations only. Segment is in the early phases of exploration and discovery for supporting customer “web plugins” for custom device-mode destinations and other use cases, but this is unsupported today.
How do I publish a destination to the public Segment catalog?
If you are a partner, looking to publish your destination and distribute your app through Segment catalog, visit the Developer Center and check out the Segment partner docs.
How does batching affect visibility?
The Event Delivery tab continues to show metrics for individual events, even if they are batched by your function code. For more information, see Destination functions logs and errors.
How does batching impact function use and cost?
A function’s use depends on the number of times it’s invoked, and the amount of time it takes to execute. When you enable batching, Segment invokes your function once per batch rather than once per event. The volume of events flowing through the function determines the number of batches, which determines the number of invocations.
If you’re sending your batch to an external service, the execution time of the function depends on the end-to-end latency of that service’s batch endpoint, which may be higher than an endpoint that receives a single event.
Which IP addresses should be allowlisted?
When data leaves Segment’s servers to go to various destinations (not including warehouses), Segment uses Amazon Web Services (AWS) and utilizes many different machines in order to send requests.
The IP addresses that are used to send these requests can be found here. If you want to allowlist these specific IP addresses, you need to allowlist all of the IP addresses from your workspace’s location range. Below are the ranges:
- For a US workspace:
AWS us-west-2 - For an EU workspace:
AWS eu-west-1
Can I use a Destination Function to send data to another Segment source?
Yes, to do so, remove the messageId and the writeKey from the payload in your Function code. Leaving either field on your payload will cause unexpected behavior that may cause your event to be delivered to the wrong source or to not be delivered at all.
Can I view console.log() outputs in Destination Functions?
Incorporating console.log() statements in your Destination Function code aids in debugging. However, logs generated by these statements will only be accessible in the Event Delivery view if the payloads encounter errors during processing. Logs from successfully processed payloads are not displayed.
This page was last modified: 15 Apr 2024
Need support?
Questions? Problems? Need more info? Contact Segment Support for assistance!