Increase conversion with personalized lifecycle campaigns
With this recipe, you’ll learn how to create behavior-based email campaigns personalized to different personas of your product.
With this recipe, you’ll learn how to create behavior-based email campaigns personalized to different personas of your product.
Chances are, your business doesn’t just cater to one type of customer. Maybe it’s selling to businesses vs consumers. Perhaps it’s selling to Marketers vs Engineers.
No two customers look the same, so it’s critical you have a plan for how these different personas will get up and running with your product.
In this recipe, you’ll learn how to craft emails which speak directly to those different buyers.
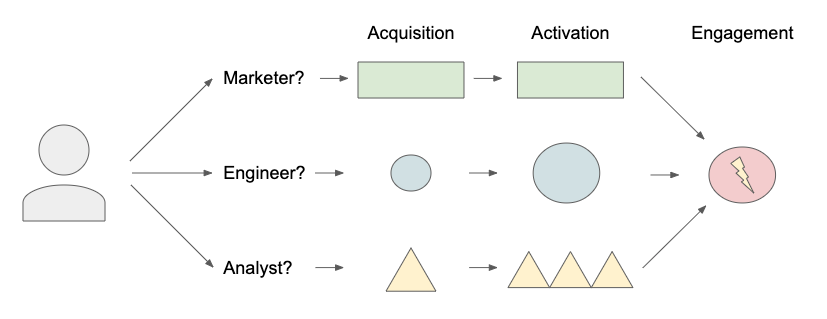
The first thing you’ll want to do is to split users into different audiences or personas.
We find it helpful to think about what attributes drive engagement among customers. It could be determined by things like:
demographic (role, location, industry)
behavior (click history, cart abandonment, downloaded content)
lifecycle (new signup vs inactive customer)
You can get this data in multiple ways.
Perhaps you use a tool like Clearbit and split your personas by demographic. Or you could you a tool like Google Analytics to split your users by the referrer or landing page they are coming in from, offering separate landing pages from different ads. Or you could pull in data from your data warehouse.
In the example below, we’ve collected this data via an in-app survey, which asks users for their role when they sign up. At Segment, we find that users most often identify first by their job title and role at a company, so that’s the persona we’ll start with.
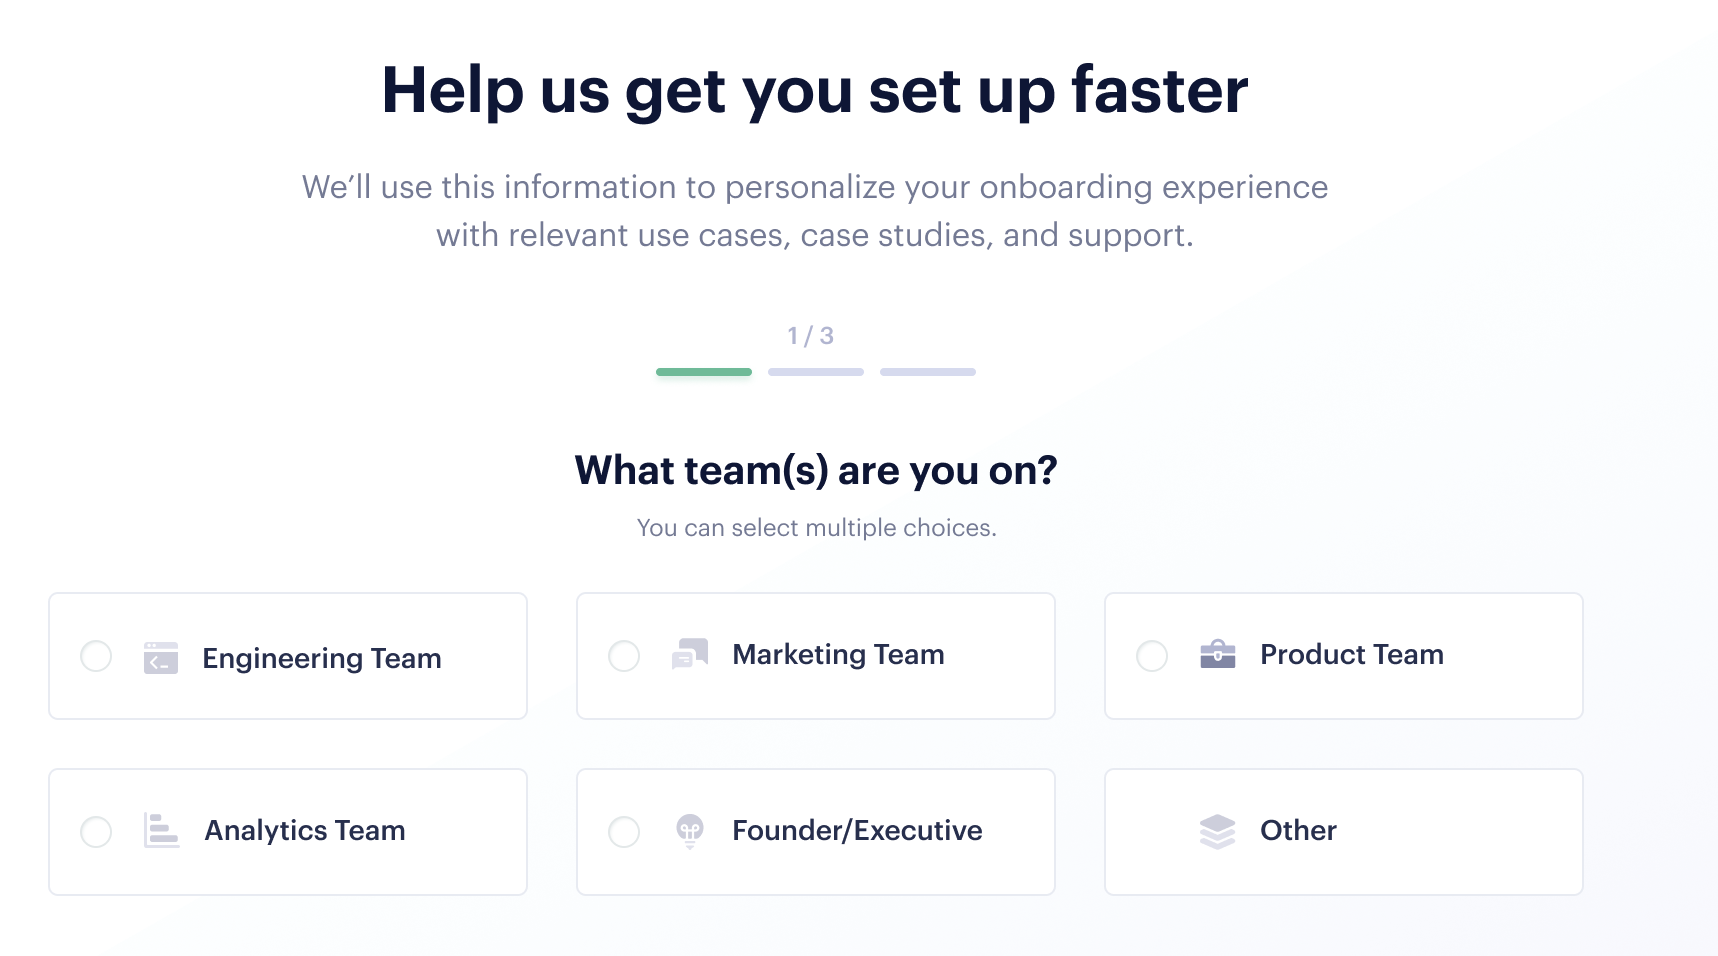
Whenever a user self-selects into one of these teams, we collect that data with Segment by using an identify call.
analytics.identify({ role: 'Product' })
From there, we need to map out the different states in our funnel.
Generally speaking, you want your funnel to back out from a single goal. In our case, we’re trying to increase our number of paying users. Then, map all the steps necessary to reach that goal.
At each step in the funnel, there are a few events that we have to track:
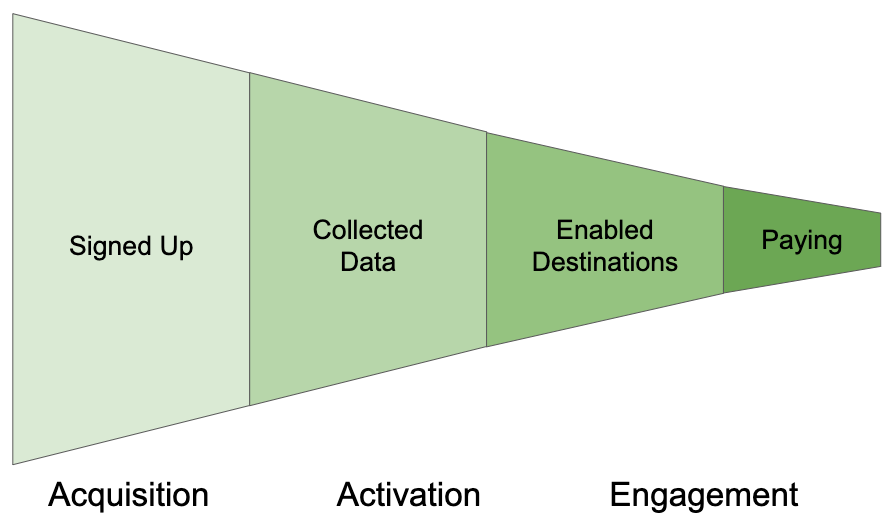
‘Signed Up’ — collected at the time of first signup.
‘Collected Data’ — triggered when the user first sends data into Segment.
‘Enabled Destinations’ — collected when a user enabled their destination.
‘Upgraded Plan’ — is triggered when the user upgrades to a paying user.
We’re collecting these all from Segment…
// called from the app when a user first signs up analytics.track('Signed Up', { email: 'user@email.com' })
analytics.identify('user-1953', { email: 'user@email.com' })
// called when the user first collects data from our backend infra analytics.track('Collected Data', { source_id: 'abc1234' })
// called when a user turns on a destination for the first time analytics.track('Enabled Destination', { name: 'Amplitude' })
// called when a user upgrades their plan analytics.track('Upgraded Plan', { type: 'Team', price: '$100' })
Once we have these four events, we have our funnel, and our personas! Time to create our email campaigns.
Start collecting key events like these with Segment 👉
The best way to visualize these email campaigns is as a matrix, split between persona and lifecycle stage. At each stage, our goal is to nudge the user to get to the next stage.

Now it’s time to write the emails, no easy task. Much will depend on your businesses’ own voice and tone, but there are a few simple rules we recommend everyone should follow.
Teach The number one goal of your emails should be to teach the user about the value they could be getting from your product. It should be nuanced, in-depth, and most importantly… teach the user something they don’t already know.
✅ Say this: They track three things via their website: signups, users who completed the setup flow, and users adding their credit card.
❌ Not this: They collect user data
Keep it simple At all costs, make sure you’re keeping your emails simple. Have just a single main CTA, with no more than three secondary CTAs down below. There should be one primary goal you’re looking to achieve. Don’t use three words when one will do.
✅ Say this: Prioritize personalization first.
❌ Not this: Personalization is the key to creating moments of delight throughout the customer journey.
Opinionated Don’t rehash older arguments a reader could find elsewhere. Before you start writing, ask yourself—what additional value can I add to what’s already out there? Try to level up what’s already there.
❌ Not this: Retention is king.
Subject lines The primary deciding factor as to whether your email gets opened or not. If you spend 30 mins writing a nurture email, it’s worth spending at least 10 mins of that time on a snappy subject line.
Some tips:
Keep it short—5 words or under works well
Use sentence case—kind of a hack but seems to work well
Ask a question—provided it’s an actual question the recipient could/would want to answer
Use ellipsis—another hack, but can work well in the right context
Describe the subject of your email—avoid clickbait at all costs
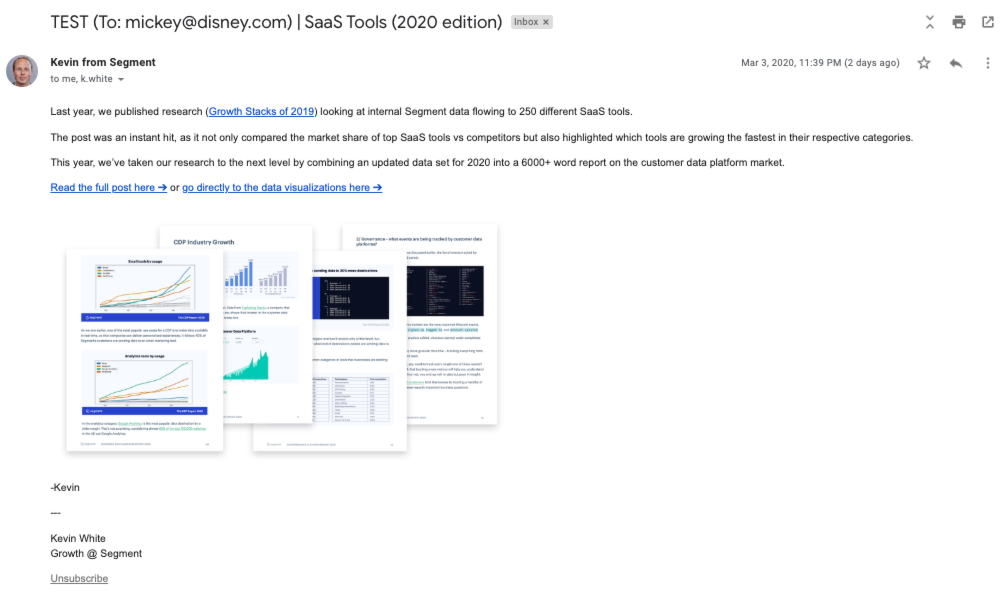
Write in lines, not paragraphs Nobody likes opening an email to a huge wall of text. Write your emails in short, snappy sentences that are easy for the reader to scan (and subsequently click). One thought per sentence/line of an email works well.
A good example 👇
While the email campaigns are relatively straightforward, not all your users will follow a linear path.
Some new signups will require more advanced email flows to help them overcome stumbling blocks they may run into
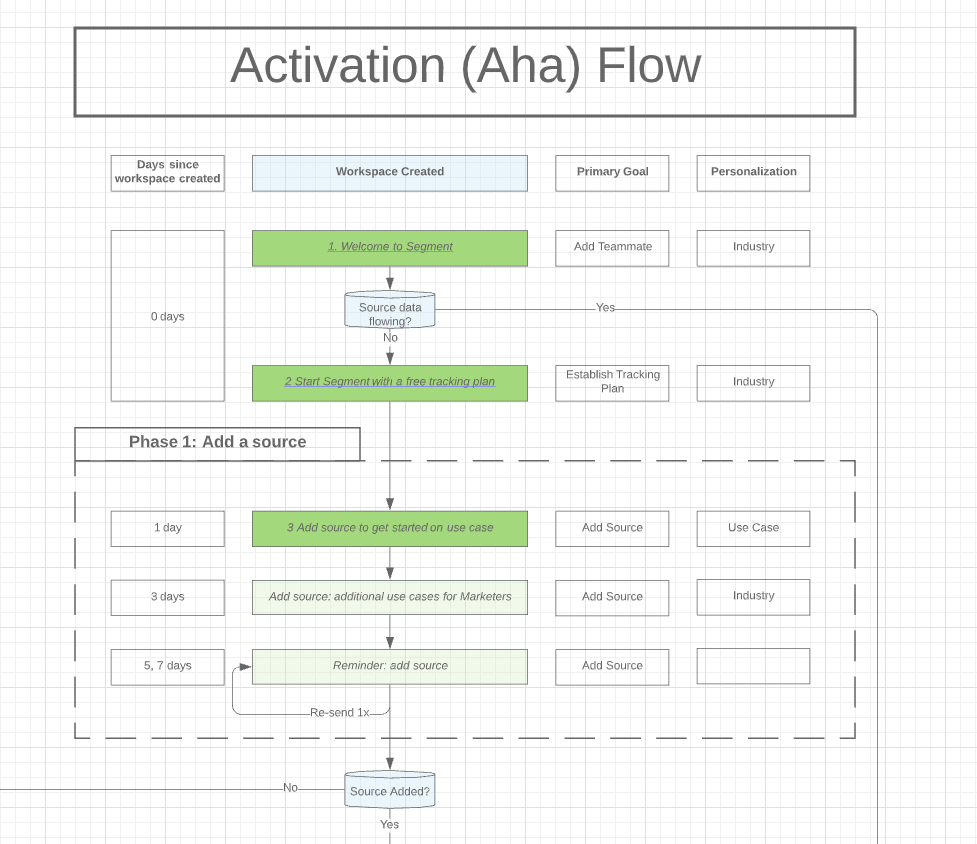
So once you’ve built out the basic flow or an email campaign, we recommend adding a few advanced flows to each campaign,
We use the following rules internally…
Add follow-ups if the user hasn’t advanced stage on 3, 5, and 7-day intervals
Change up your messaging each time to try and solve for a different “sticking point”
Personalize across a single dominant vector (industry, use case, etc)
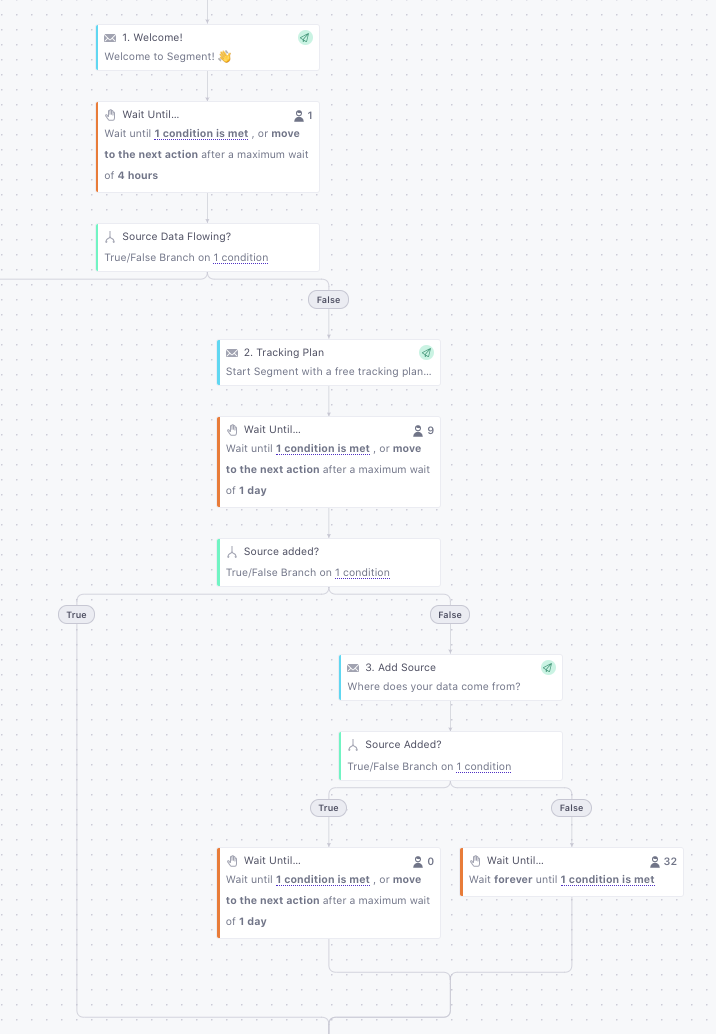
Here’s a portion of an example email flow that we’ve outlined in Lucidchart.
Get help implementing workflows like the one above 👉
Once we’ve set our campaigns live, it’s time to analyze performance.
You’ll want to measure your campaign through two lenses: impact on your core metrics (i.e. ‘signed up’, ‘collected data’, ‘enabled destinations’, and ‘upgraded plan’) as well as the performance of the email itself.
Measuring the impact on your core metrics
To accurately measure and attribute your campaign’s impact on core metrics, you’ll need to conduct an A/B test. This will help you isolate campaign results against other circumstances that might be driving a change in customer behavior (website/product changes, economic shifts, etc.).
By adding Customer.io as a Segment Source, you’ll be able to stream items like “email delivered” and “email opened” from Customer.io, back into Segment, and on to analytics tools like Mixpanel or Amplitude.
With this data, you’ll be able to compare the core metrics of users who received, opened, or clicked your campaign to those who didn’t. This gives you a 360 degree view of your users, and insights into whether your campaign is positively impacting their behavior.
Monitoring the performance of your campaign
By keeping a close eye on the performance of the emails in your campaign, you’ll be able to identify where your campaign is hitting home, or falling flat.
As a baseline, you’ll want to keep track of email open rates and clickthrough rates. In general, we try to aim for a 50+% open rate and 10+% click-to-open rate.
In Customer.io, or the email marketing tool of your choice, you can easily generate reports to review the click-through and open rates for your campaigns.
Once you identify an area for improvement within your campaign, set up an A/B test to see if metrics can be improved. Simple tweaks like changing a subject line (to improve open rate) or modifying a call-to-action (to improve clickthrough) can go a long way to impact performance.
By personalizing lifecycle campaigns to different personas and consistently monitoring performance to iterate, we’ve seen our click through rates grow by 80+%. With Segment, you’ll be able to reach the right users at the right time with the right, personalized message.
Get help implementing this use case by talking with a Segment Team member or by signing up for a free Segment workspace here.

Our annual look at how attitudes, preferences, and experiences with personalization have evolved over the past year.