Building a single view of your customers requires data collection across all channels. And, as the number of connected devices per user increases, that becomes more and more difficult. A user could start their experience on your website, move to your mobile app, and then interact with your brand on their watch.
Thankfully, Apple has built a new programming language called Swift to help you reliably track data across the devices your customers use (when they allow it). Swift supports iOS, iPadOS, macOS, tvOS, and watchOS. Plus, there are a ton of other benefits for developers that come along with Swift. You can learn more about Swift here.
Segment also provides a library specifically for adding Segment to your Swift applications, with Analytics-Swift, which is now generally available.
In this recipe, we will cover how to add Analytics-Swift to your Swift application for watchOS, so you can get a more complete view of user behavior. Bonus: if you want to see this in action and don’t have time to go through the recipe, you can see a sample watchOS application that already uses Segment!
Step 1: Create a Swift Source
In your workspace, navigate to Connections
Select
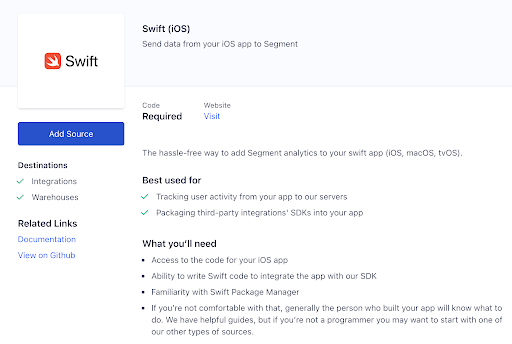
Add SourceIn the catalog, search for Swift
Select
Swift (iOS)Select
Add Source

6. Give your source a name and add any associated labels, such as dev or prod.
Step 2: Add the Segment Analytics dependency to your application
This step is also detailed in the source overview for the Swift source that was created in the first section.
1. Add the Swift package as a dependency using one of the following methods:
Add analytics-swift in your
package.swiftfileAdd analytics-swift via Xcode's File -> Swift Packages -> Add Package Dependency menu item using the Github path listed

git@github.com:segmentio/analytics-swift.git
2. Once completed, analytics can be referenced in your Swift code by importing Segment's analytics package

3. Initialize the analytics client in a lifecycle method such as applicationDidLaunch(). This code is available for you in Step 2 of the Overview section of the source you created in Segment.

4. This snippet enables automatic tracking of lifecycle events, so you can capture events like Application Opened without any extra code
Note: the process for adding a Swift package will be different for Xcode 13.
Step 3: Use Segment to track events within the application
In your application code, add a Segment method for an event that you wish to capture, for example, identify a user or track when a tap was triggered. For example:
analytics.screen(title: "Main Screen") or analytics.track(name: "track tapped")Run your application. Events will be created for the application lifecycle events, which was enabled in the client configuration step using:
trackApplicationLifecycleEvents(true)If you did not enable this, then test the action that you added an analytics call to in order to generate an event
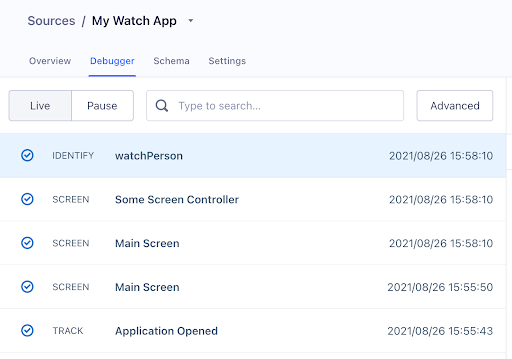
Open the Debugger for the watchOS source in your Segment workspace
View the events that are coming from the watchOS application

Step 4: Connect your watchOS source to a destination
Connect the source to a destination
Trigger the action that your test event is tied to
See data from your watchOS source flowing into the destination
From here, you can begin to refine the events you are capturing within the application. All of the details on the available client methods can be accessed in the Analytics-Swift readme.
Wrapping up
Here’s what we accomplished in this recipe:
We enabled a Swift Source to collect data from a watchOS application
Added the Segment analytics dependency to your application
Used Segment to track events that occurred within the watch application
Connected your watchOS source to a destination
Getting started is easy
Start connecting your data with Segment.