This post is the second in a three-part series from Looker, a Segment Warehouses partner, sharing strategies to solve common analytics conundrums. On to user sessions!
As we mentioned in the first post, universal user IDs are the foundation for complex web and behavioral analysis. The next step is tying those single identities to a string of actions, which is what we call a user session.
Some out-of-the-box tools will do this for you automatically. However, when they do the reporting under the hood, it’s hard to know exactly how they calculate a user session, and if it’s right for your business. Instead, we recommend using SQL and LookML to build out user sessions yourself.
By transforming event-level data to metrics from the ground up, you can design them to your use case, gain greater flexibility and dig deeper into the details. With the basis of a universal user ID, this post will show you how you can sessionize user activity.

What Is a Session?
Simply, a session is defined as a string of user interactions that ends when specific criteria are met. For example, a user session might be defined as every action a user takes from when they land on your app to when they log off, or reach a 30 minute interval.
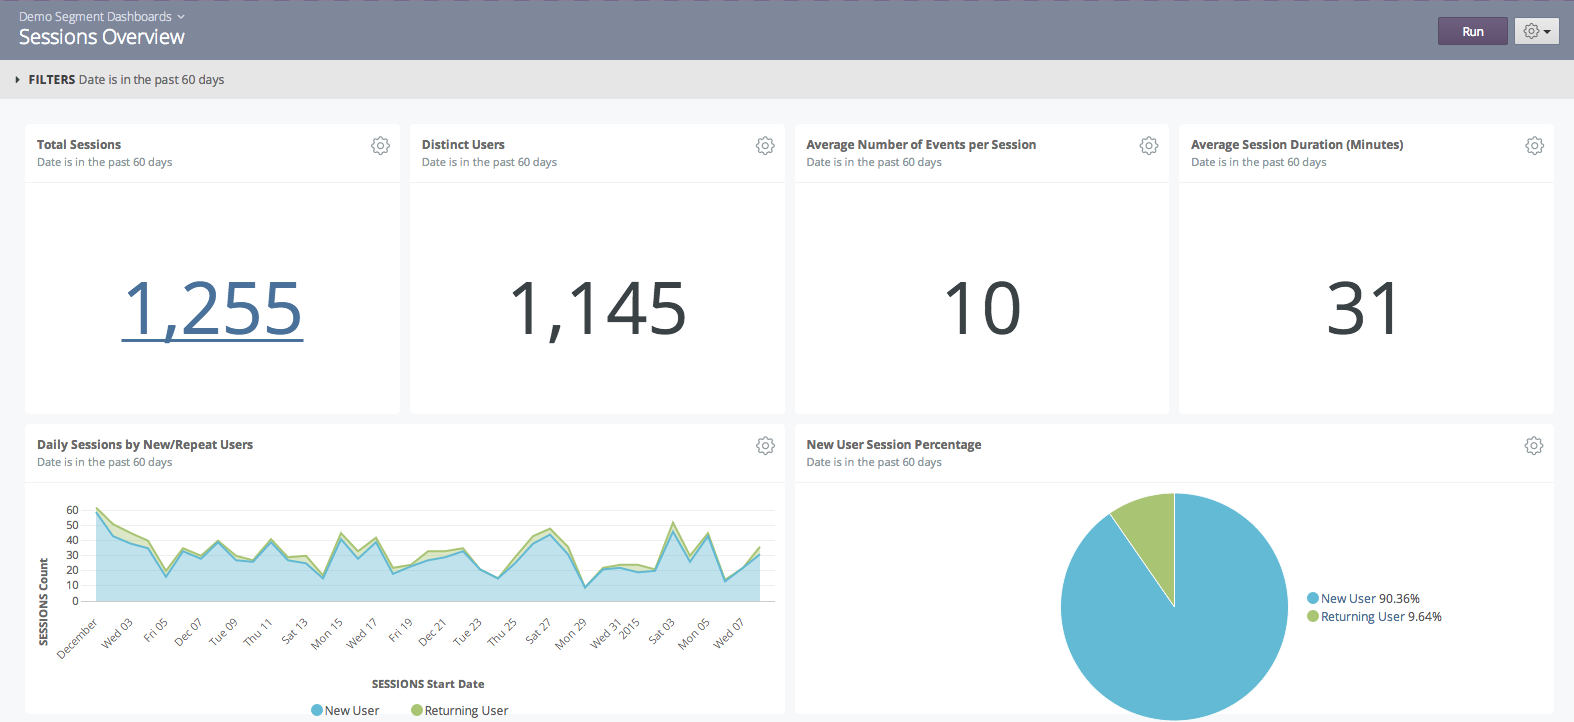
Sessions are the building blocks of user behavior analysis. Once you’ve associated users and events to a particular session identifier, you can build out many types of analyses. These can range from simple metrics, such as count of visits, to more complex metrics, such as customer conversion funnels and event flows (which we’ll approach in the third post). Assuming we already have a Universal Alias ID methodology in place, we can also examine session metrics over time, such as user lifetime values and retention cohorts.
Many prepackaged web analytics solutions include sessionization, but they typically implement very “black box” version, giving the end user little insight into or control over how sessions are defined.
Different businesses may want to vary session definitions by the user inactivity required to terminate a session, how much buffer time is added to the last event in a session, and any other more custom requirements pertinent to a specific application’s use case. They might also want to differ session logic across devices, since behavior varies greatly based on screensize. For instance, in e-commerce, users on mobile are more likely to be researching on their phone to purchase in store in comparison to web users.
With Looker’s custom LookML modeling layer, you have complete control over how sessions are defined.
Universal User ID Refresher
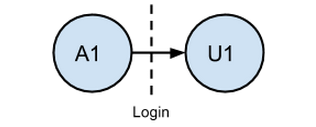
In the previous post, we covered how to create a map from disparate user identifiers to a single Universal Alias ID. This process is integral to creating the most accurate event analytics, and therefore session definitions. Thinking about it simply for one user as they login:

The diagram shows the transition from Anonymous ID to User ID. If we didn’t map A1 and U1 to a common identifier, we’d either create two distinct sessions by using both IDs, drop all the events pre-login if we chose only the logged-in user ID, or not be able to map these events to subsequent visits if we choose the anonymous ID. Setting up a Universal Alias Mapping resolves this issue, so we just get one session encompassing both pre-login and post-login events, with user traceability to future sessions.
How to Build Sessions
Session creation can be completed in Looker in a few steps using persistent derived tables (PDTs). PDTs allow you to create views from SQL queries that have been written to a scratch schema that Looker has write access to. These views can then be referenced throughout our model.
First, let’s persist the critical elements of the tracks table mapped to the Universal Alias ID. You’ll see that we’ve left joined in the existing universal_alias_mappingtable that we previously created to accomplish this. The sql_trigger_valuedetermines how often the table is updated and can be customized to the implementation. In this case, I’ve set it to when CURRENT_DATE changes, or each day at midnight.
From these mapped tracks, we’ll create our sessions in another persistent derived table. Let’s assume our session definition foremost relies on elapsed inactivity time. First, we’ll need to determine the amount of idle time between events themselves. This step can be accomplished using the lag() function in Redshift.
Idle_time is the time in minutes between the current event and the previous event for the mapped user. Once we have that value we can set how much inactivity is necessary to terminate a session, and then begin a new one on return. In this case, we’ll assume this is 30 minutes, which is a commonly used timeout window, but this can be assigned to any time value based on the duration you’d expect between your events when a user is active.
Our original query is now aliased as the the subquery lag. From that base, we can select only events where lag.idle_time is greater than 30 minutes or when lag.idle_time is NULL(meaning it is the first session for the user).
The timestamps of these events are the session start times. The session identifier can simply be taken from the combination of the User ID and the session sequence number, which will be unique for each session. A session sequence number is assigned by choosing the row number after ordering the sessions by start time and partitioning by user. Boom! Now we have the ability to calculate metrics such as sessions per day and sessions per user.
Tying Up Sessions
Now, we’ve marked the events corresponding to each session start, but we still need to identify the events contained within the session and the events ending the session. This will require another step in Looker.
Note that previously in the session query, in addition to determining the start time of the current session, we also determined the start time of the next session — which will be important here. Once we’ve persisted the sessions we’ve just generated in a PDT, we can create what we refer to as a Sessions Map using the following syntax:
Referring back to our Mapped Tracks table, we’ll join the newly created Sessionstable on user_id, where the tracks event timestamp (sent_at) is between the session start (inclusive) and next session start (exclusive). This enables us to assign a session ID to each event in Mapped Tracks. Then we can determine the end of a session using the following query involving the persisted Sessions, Tracks, and newly created Sessions Map.
Using the LEAST() function in Redshift enables us determine the time of the end of the session – the next session start time or the time of the last event of the current session plus 30 minutes, whichever comes first. This 30 minute value is the “buffer” time added to the timestamp of the last event, and can be customized easily in the SQL as is relevant to the use case. In addition, we can compute the number of events in the session in this step. Persisting the resulting table (we’ll refer to this as Session Facts) and joining it back to sessions give us the complete basic session metrics: User ID, Session ID, Session Start, Session End, and Events per Session.
Using Sessions to Perform Bounce Rate Analysis
Now that we’ve built our customized sessions, we can go ahead and analyze them. Custom session generation enables you to know exactly what your metrics mean and get the most value from them, since you define how they are built – from start to finish. With this method, you can analyze session counts, session duration, events per session, new/repeat usage, user cohort analysis and much more. To give an example, we’ll focus on a commonly used metric in web analytics based on sessions: bounce rate.
Bounce rate can be a great measure of how “sticky” your content is, since it measures how many people drop off before they become engaged with your application. A bounced session is usually defined as a session with only one event. Since the number of events per session is defined in our Session Factsview, you can easily add the dimension is_bounced to identify bounced sessions in your model:
Assuming we’ve joined the Session Facts table to Sessions in the LookML model, we can now use the is_bounced dimension to segment sessions. A simple example is daily trending bounce rate and overall percentages. These elements can additionally be dimensionalized by any other attributes from the tables we’ve joined in, such as geography, time, and campaign to determine their respective “stickiness” or user engagement.

You Can Do It!
A lot of value is provided from sessionization when it can be customized specifically for your use case and desired definitions. A solution that gives you the flexibility to define your own rules when it comes to structuring user event behavior for your business is important to accomplish this. We build off these custom user sessions in the third blog post of this series, where we extend sessionization to custom funnel and event flow analysis. Check it out!
Want to learn more about Looker and Segment? Let us know.

Test drive Segment CDP today
It’s free to connect your data sources and destinations to the Segment CDP. Use one API to collect analytics data across any platform.